Warframe, the beloved multiplayer action RPG, is famed for its signature armor mechanic. Instead of Classes, Warframe players can equip various Warframes – ancient suits of armor with unique powersets – to fight enemies.
At first glance, a player can stick to the first Warframe they chose and modify it to their liking. However, people also have the opportunity to gain almost any Warframe for free – provided they have the patience to get their crafting materials. For players who want to dedicate time to a new Warframe, what exactly is their best option? Which Warframe should they avoid in the meantime?

19 Best Sci-Fi Games On Switch
Though they may not seem like the console's main genre, there are tons of amazing sci-fi games awaiting fans on the Switch.Updated on February 21, 2024 by Rhenn Taguiam: With Warframe 1999 gearing up for major lore developments in the acclaimed free sci-fi action game, fans of Warframe’s stealthy action gameplay may be put to the test as they chase Albrecht Entrati in the pace while the Man in the Wall has begun its ascension towards becoming the game’s next villain, the Indifference. With threats in all directions about to close in on the Tenno, players may want to master some of the game’s more acclaimed Warframe units such as one that relies on clones to distract enemies, a unit capable of making enemies subservient to him, a healer that gives constant regens to allies, and a melee specialist.
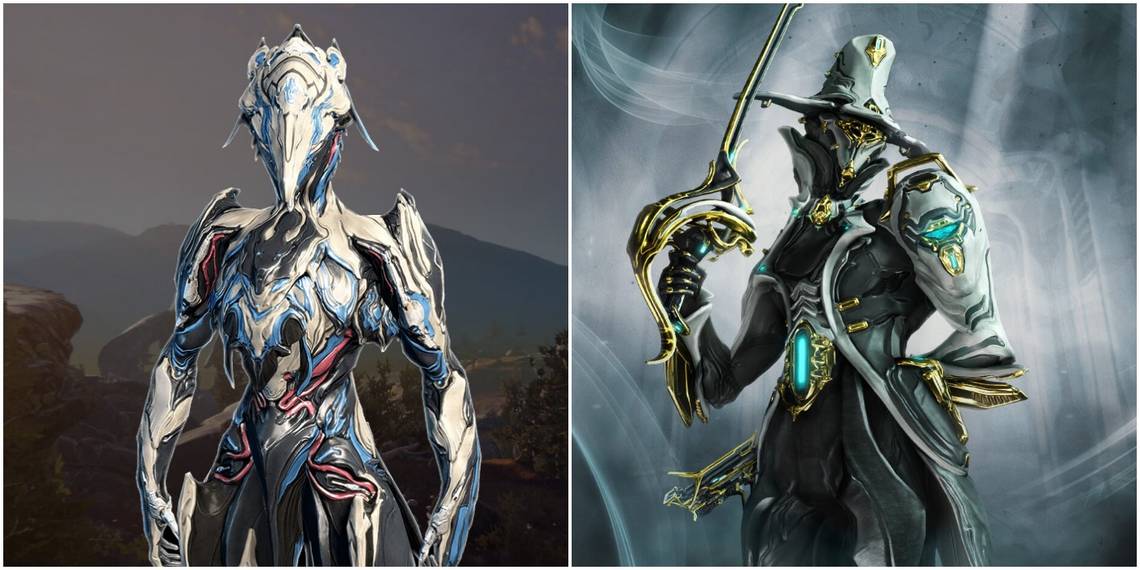
25 Limbo
Space-Time Control Provides Various Mobility Options

|
Passive |
Dodge gives way to entering and exiting the Rift, leaving a portal that recharges Energy. Kills in the Rift give +10 Energy |
|---|---|
|
1st Skill |
Banish: Damage enemies and get them and allies out of Limbo's current plane |
|
2nd Skill |
Stasis: Enemies in the Rift are Frozen. Projectiles are also Frozen and only resume their path when the ability ends |
|
3rd Skill |
Rift Surge: Enemies in the Rift have Rift Surge that passes onto enemies outside if they are killed. Rift Surged enemies that leave the Rift perform Banish |
|
Ultimate |
Cataclysm: Unleash a blast of void energy that opens a rift tear before damaging opponents again as it closes |
As his name suggests, Limbo traverses the paths between realms. His Passive introduces the Rift Plane, an entirely new mechanic that capitalizes on Warframe's psychics. Banish (S1) lets enemies experience the wrath of the Rift. Meanwhile, Stasis (S2) stuns Banished opponents, while Rift Surge (S3) attacks them. Lastly, Cataclysm (Ult) summons a miniature black hole of sorts to mangle through enemies.
There's no need to mention Limbo's fame, thanks to his space-themed kit. All of Limbo's abilities boast decent damage, all of which can be turned devastating with the right combos. Limbo can easily phase out enemies, stop projectiles, and even create miniature black holes.
24 Nekros
Death Is Wealth With Drop Buff, Minions

|
Passive |
Get +5 Health whenever an enemy dies within 10m |
|---|---|
|
1st Skill |
Soul Punch: Hit an enemy and release their soul to damage enemies on a path behind it |
|
2nd Skill |
Terrify: Force enemies to flee in terror |
|
3rd Skill |
Desecrate: Make fallen enemies drop more loot |
|
Ultimate |
Shadows of the Dead: Summon Shadows from fallen enemies to become temporary allies |
Nekros has been a prominent part of the Warframe universe since 2013 and still manages to be incredibly relevant in 2022. Those that are seeking a great beginner Warframe, or need a hero that is exceptional at resource farming, will want to check out Nekros. He's usable in almost any mission and is capable of being incredibly tanky if built correctly. His Soul Punch (S1) can transform enemies into projectiles, and mark them, transforming them into allied shadows should they perish while marked.
Terrify (S2) is a great way to create space, as it causes enemies nearby Nekros to flee in terror. Desecrate (S3) is the ultimate farming tool, as it forces enemies to drop even more loot when they die. When Nekros uses his Shadows of the Dead (Ult) ability, he is capable of summoning defeated enemies to fight alongside him for a short time, giving him access to a veritable army.
23 Nezha
The Best Mobility Is The Best Offense

|
Passive |
Get +60% Slide Speed and +35% Slide Distance |
|---|---|
|
1st Skill |
Fire Walker: Rush to create a flame trail that cleanses allies and damages enemies |
|
2nd Skill |
Blazing Chakra: Burn enemies from afar and emit Healing upon death. Reactivate to teleport to the position |
|
3rd Skill |
Warding Halo: Stun and damage enemies who get too close |
|
Ultimate |
Divine Spears: Stun enemies by impaling them using spears on the ground |
Players looking for an interesting, high-mobility Warframe that is capable of filling multiple roles should check out Nezha. His high health pool, fast sprint speed, and crowd control make him a viable option as a tank or a DPS depending on how players build and use him. Fire Walker (S1) gives him great movement as it leaves a trail of flame which can end in an explosion of fire should players teleport.
Warding Halo (S3) gives him a safety bubble that will stun any enemies that get too close and Blazing Chakram (S2) acts as a ranged attack that simultaneously makes enemies more susceptible to damage and forces them to drop restorative orbs when they perish. Those that find themselves surrounded by foes can use Divine Spears (Ult) to impale their attackers and then re-use the ability to slam any survivors harshly into the ground.
22 Garuda
Buffs Incentivize Heavy-Damage Plays

|
Passive |
Can get up to +100% Damage temporarily based on how fast she kills enemies. She uses her Talons if she has no melee weapons |
|---|---|
|
1st Skill |
Dread Mirror: Use the enemy's life force as a shield to get damage. Charge to transform it into a projectile |
|
2nd Skill |
Blood Altar: Use the enemy's body on an altar to give Health for Garuda and her allies |
|
3rd Skill |
Bloodletting: Gain Energy by sacrificing Health |
|
Ultimate |
Seeking Talons: Charge to set an area and release Talons on the target. Survivors are more prone to Bleeding |
If Garuda and her arm blades were any indications, players could spice up their Warframe gameplay with a bit of melee combat brutality. When not equipping any melee weapon, players can use Garuda’s Talons instead, as they can be modded and customized separately in missions. Her Passive Death’s Gate grants up to 100% damage bonuses to her abilities each time she kills an opponent, with damage increasing by 5% per kill.

7 Best Sci-Fi Co-Op Games, Ranked
Those looking for a fun sci-fi experience to share with their friends should check out these co-op games.Her mastery of life and death is reflected easily in Dread Mirror (S1), where she conjures a mirror out of the opponent’s life force that absorbs damage and also creates a projectile attack. Meanwhile, Blood Altar (S2) impales a target with her talons and steals health for Garuda and her teammates. This constant life drain is essential, however, as Garuda can trade some of her life force for Energy via Bloodletting (S3). Lastly, her Ultimate Seeking Talons will have Garuda’s talons explore the area and hit targets, with survivors being more prone to damage-over-time bleeding.
21 Rhino
Melee Specialization Comes With High Defense And Crowd Control Potential

|
Passive |
Release a 100 Damage shockwave when landing from great heights |
|---|---|
|
1st Skill |
Rhino Charge: Charge towards a target and damage anyone in the way |
|
2nd Skill |
Iron Skin: Harden skin to grant Damage Resistance to self |
|
3rd Skill |
Roar: Boost the damage to allies for a short time |
|
Ultimate |
Rhino Stomp: Stun enemies with stomps |
Those looking for a solid tank will definitely want to consider Rhino. This hulking Warframe is capable of mitigating damage like an absolute beast, giving teams of fragile Warframes a chance to burst out a massive amount of damage without the need to constantly dodge enemy attacks. Rhino can be a valuable asset in tons of situations and is very rewarding to play for gamers looking to help the team.
Rhino's Charge (S1) gives him a great gap closer, allowing him to quickly rush towards problematic enemies, and his powerful Rhino Stomp (Ult) will temporarily stasis all nearby foes. He's even got the ability to buff teammates, giving them increased damage with his Roar. To cap it all off, his Iron Skin (S2) helps him withstand attacks that would easily shred other Warframes.
20 Gara
Creative Glass AOEs Fit Solo, Team Setups

|
Passive |
May create a 10-second blind that takes effect when exposed to bright light |
|---|---|
|
1st Skill |
Shattered Lash: Strike multiple ways with shattered glass |
|
2nd Skill |
Splinter Storm: Grant Damage Resistance to allies while damaging enemies as well as their weapons and lessening their damage |
|
3rd Skill |
Spectorage: Trap enemies in mirrors that release images of themselves that deal damage when destroyed |
|
Ultimate |
Mass Vitrify: Slowly crystallize enemies that enter a ring of molten glass. The expansion will harden the ring to block weapons fire, while the ring gains strength from Health and Shields of affected enemies. Use S1 to destroy the ring and send shards outwards for an AOE |
Glass may not seem like the strongest choice when it comes to combat, but the Warframe Gara makes incredible use of the material. This high-armor multi-class hero can use Glass to help defend herself and is also capable of turning her enemies into brittle versions of themselves before effortlessly shattering them into pieces. Her Splinter Storm (S2) is a dual-purpose AOE ability that will slice and dice through any enemies it contacts while simultaneously fortifying any allies that are caught in its range.
Shattered Lash (S1) gives her a solid damaging ability, while Spectrorage (S3) will taunt enemies into attacking mirrors that actually damage them upon shattering, helping to draw fire away from teammates. While all of these abilities are good, the real showstopper is Mass Vitrify (Ult), which unleashes a circle of molten class that will encase enemies and then harden to block oncoming gunfire for a short time. Players that use Shattered Lash can effectively explode the ring and send shards flying in all directions.
19 Sevagoth
Death Itself Becomes An Ally In Combat

|
Passive |
Transform into Sevagoth's Shadow upon death and collect souls to resurrect |
|---|---|
|
1st Skill |
Reap: Sevagoth's Shadow leaps forward and attacks enemies. Survivors are dealt Damage-over-Time by Death's Harvest, while the dead's souls fill the Death Well |
|
2nd Skill |
Sow: Drain the lifeforce of targets with a Death Seed before detonating them, dealing some HP% as Radial Damage. Fills Death Well |
|
3rd Skill |
Gloom: Emit a wave that stuns and slows enemies. Allies in the wave steal Health with attacks. Fills Death Well |
|
Ultimate |
Exalted Shadow: Use Sevagoth's Shadow to deal melee attacks |
Deathly Sevagoth manipulates the Void itself to cast shadows and darkness to devastate his enemies. Quite the versatile Warframe, Sevagoth acquires two “forms” when used: its base Warframe form and the Shadow. Upon death, Sevagoth summons his Shadow, which must harvest souls in order to revive his physical form. The Shadow has a separate form and base abilities, giving Sevagoth a second life to turn the tide of battle.
The Shadow is also an integral part of Sevagoth’s skillset. Reap (S1) summons the Shadow to attack enemies at the front. Sevagoth also acquires a handy lifesteal ability with Sow (S2), which plants a leeching death seed, and Gloom, a shadow wave. Over time, Sevagoth can trigger Exalted Shadow (Ult) which unleashes the Shadow for devastating melee attacks.
18 Trinity
Healing Mastery Secures Survival Of The Team

|
Passive |
Get +25% Ally Revive Speed and +50% Ally Revive Distance |
|---|---|
|
1st Skill |
Well of Life: Damage affected enemies to get Health |
|
2nd Skill |
Energy Vampire: Get Energy over time when enemies are marked with this skill |
|
3rd Skill |
Link: Damage taken when Link is active is received by a nearby enemy |
|
Ultimate |
Blessing: Allies get temporary Damage Immunity as well as Health and Shield Regeneration |
Trinity is as straightforward as she can get – she's a support Frame. Trinity's Passive allows her to revive teammates much faster. Meanwhile, she boasts a unique "attack" in the form of Link (S3) that dissipates damage taken to nearby enemies. Trinity's Well of Life (S1) grants lifesteal to allies against the targeted foe, while Energy Vampire (S2) does the same for energy. Lastly, her Blessing (Ult) not only heals the party's HP and Shields but also grants some damage resistance.

Sci-Fi Games With The Hardest Space Combat
Space Combat is an exhilarating addition to the best sci-fi games, but for some, it's a rather difficult fare.Thanks to Trinity's accessible kit, she easily boasts some of the most efficient defensive abilities out there. After all, Trinity's skills help her replenish ally resources and even disperse enemy attacks back to their sources. While other Frames may boast better support skills, Trinity's perfect for anyone who wants a healer role.
17 Titania
Master Debuffs For Long-Term Survival

|
Passive |
Using abilities heal Titania and nearby allies |
|---|---|
|
1st Skill |
Spellbind: Nearby allies receive Status Effect Immunity, enemies are sent to the air |
|
2nd Skill |
Tribute: Inflict effects depending on the setting, be it damage reduction (Thorns), lower target accuracy (Dust), boost companion damage (Full Moon), or enemy slows (Entangle) |
|
3rd Skill |
Lantern: Transform an enemy into a beacon that other enemies will follow before it explodes |
|
Ultimate |
Razorwing: Titania shrinks and flies while insects attack enemies |
Perhaps the perfect equivalent of the queen of fairies, Titania in Warframe gameplay is a mistress of her own personal army of mechanized butterflies. Her Passive gives her an automatic 25% boost to Rolling and Bullet Jumping distance, giving her an edge in mobility. Not only that, but Titania’s abilities also give the Upsurge buff to all allies within 15 meters that regenerates 4 HP per second for 20 seconds. This works well with Spellbind (S1), which not only disarms enemies but also grants her allies temporary immunity to status effects.
A polar opposite of Spellbind would be her Tribute (S2) where she forces a debuff on an enemy she damages, be it damage reduction and reflection (Thorns), accuracy reduction (Dust), increased damage taken (Full Moon), and slowed movement (Entangle). Meanwhile, Lantern (S3) is a decent distraction as it forces enemies to gather around a cluster of razorflies before they explode for burst damage. Lastly, her Razorwing (Ult) forces Titania to shrink down and fly as she wishes while a gathering of razorflies viciously attack foes.
16 Xaku
Multiple Warframe Parts Add Flexibility To Combat Styles

|
Passive |
Get -25% Damage from AOE and may avoid incoming Weapon Damage |
|---|---|
|
1st Skill |
Xata's Whisper: Transform equipped Weapon Attacks into Void Damage |
|
2nd Skill |
Grasp of Lohk: Steal weapons from enemies and use them as floating weapons against them |
|
3rd Skill |
The Lost: Can use any one of the abilities of its component Warframes, like Accuse (transform enemies into allies), Gaze (reduce defenses), an Deny (boost damage dealt) |
|
Ultimate |
The Vast Untime: Shed Xaku's current armor to reveal a faster skeleton, and enemies become weaker when Xaku damages them |
One of the more unique Warframes out there for fans to dig their hands into would be Xaku, an amalgamation of various old Warframes with an unstable power source. At the hands of players, Xaku can be a formidable long-ranged support unit, especially since bis Passive gives him a 25% Dodge chance against attacks and a constant 25% Damage Reduction against AOEs. This support potential gives him a lot of room for crowd control as well, as The Lost (S3) allows Xaku to access his three (3) Warframe components to stun enemies in various ways.
In combat, Xaku can use Xata’s Whisper (S1) to periodically transform all attacks into Void damage to boost his damage output. He may also use Grasp of Lohk (S2) to steal all ranged weapons from enemies to force them to go melee, all the while Xaku uses their weapons as floating long-ranged replicas. Lastly, his Ultimate The Vast Untime (Ult) expels Xaku’s armor, with enemies hit getting increased damage against Void Damage while revealing a skeletal form that has increased speed and dodging opportunities.
15 Nova
Control The Battlefield With Teleports, Timed Attacks

|
Passive |
Being knocked back releases a 6m Defensive Wave that topples attackers and deals damage |
|---|---|
|
1st Skill |
Null Star: Release antimatter particles that seek and attack nearby targets |
|
2nd Skill |
Antimatter Drop: Release a cluster of antimatter particles that detonate on contact |
|
3rd Skill |
Wormhole: Travel instantaneously with wormholes |
|
Ultimate |
Molecular Prime: Use antimatter to Prime all enemies |
Nova unleashes the power of antimatter to devastate enemies that threaten her and her allies. Her Passive counters any knockdowns on her with another neat knockdown, while her Worm Hole (S3) gives her a handy warp portal. Nova possesses damage dealers via Null Star (S1) that unleashes seeker missiles and Antimatter Drop (S2) which is a collision AOE. Her Molecular Prime (Ult) primes enemies within her radius with antimatter.
Given her abilities, Nova perhaps serves as the best example of a lightweight but devastating Mage class in Warframe. All her skills provide her with decent single-target and AOE damage. Despite her glass cannon nature, Nova actively encourages playing with elemental damage and even understanding how to boost the potency of her abilities with the right modding.
14 Wukong
Defy Death With Various Survival Options

|
Passive |
Avoid death up to 3x per mission |
|---|---|
|
1st Skill |
Celestial Twin: Summons a twin to fight opposite of Wukong's style - long-ranged (if Wukong is close) or in melee (if Wukong is afar). Use again to deal extra damage |
|
2nd Skill |
Cloud Walker: Float around the battlefield to stun enemies encountered and heal Wukong and the Celestial Twin |
|
3rd Skill |
Defy: Become Invulnerable and provoke enemy attacks, storing their damage and returning them in one strike. Wukong gains Bonus Armor relative to the damage taken |
|
Ultimate |
Primal Fury: Wreak havoc with the Iron Staff |
Players don’t necessarily have to worry about going solo in Warframe gameplay when they can constantly divide themselves with Wukong. Such is the reckless nature that his Passive allows him to cheat death three (3) times using special techniques that either boost elemental damage or orbs, grant invulnerability or invisibility, or secure extra loot drops from opponents. This Passive is more for emergencies, however, as Wukong’s Celestial Twin (S1) is already a formidable ability to possess. This conjures a Specter with all his weapons while attacking and protecting Wukong.
And if Wukong does need defensive measures, Cloud Walker (S2) not only transforms Wukong into a cloud of smoke but also stuns opponents while healing Wukong and his team. Meanwhile, Defy (S3) makes Wukong and his twin invulnerable, with damage absorbed and then unleashed in a powerful attack - making him the rather OP Warframe. Lastly, for that dash of martial arts, his Ultimate Primal Fury summons the Iron Staff that gives Wukong massive buffs while striking at mid-range.
13 Khora
Tag-Team Enemies With Power Companion

|
Passive |
Venari the Kavat aids Khora and gives +15% Speed while present. When killed, Venari returns after 45s |
|---|---|
|
1st Skill |
Whipclaw: Send enemies back with a powerful attack |
|
2nd Skill |
Ensnare: Trap enemies. Whipclaw refreshes the trap |
|
3rd Skill |
Venari: Command Venari to focus on a target. Can be toggled to Attack, Protect, or Heal, or instantly revive the pet |
|
Ultimate |
Strangledome: Create a dome that strangles enemies and forces their allies to shoot on them. Whipclawing the dome increases its damage |
Khora the huntress stalks her prey with her familiar, as they provide offensive support for her squad. Through her livewire, Khora can release a barrage of attacks – be it through her claws, whiplash, and sheer steel-on-steel action. Unlike other Warframes, Khora has a companion: Venari, complete with her own special traits and stances that affect her combat performance.
In battle, Khora has access to attacks that capitalize on various range of options. Her Whipclaw (S1) is an extremely potent long-range attack. Ensnare (S2) can stun enemies, leaving them wide open for fierce combos. Meanwhile, Venari (S3) orders the companion to focus on a foe or get revived instantly. Lastly, Strangeldone (Ult) creates an ensnaring drone that strangles and damages enemies.
12 Volt
Constantly Shock Enemies To Submission

|
Passive |
Movement on the ground can generate an electrical charge that can deal up to 1000 Damage per meter that is released in the next attack |
|---|---|
|
1st Skill |
Shock: Damage and stun a target at long range while chaining damage to nearby enemies |
|
2nd Skill |
Speed: Give a speed boost to Volt and nearby allies |
|
3rd Skill |
Electric Shield: Create an energy obstacle for extra cover |
|
Ultimate |
Discharge: Stun nearby enemies with a charge that also paralyzes approaching enemies |
Sparky Volt has more to him than just his affinity with lightning. His Passive gives him a constant Electricity Damage boost, perfect for his abilities. His Shock (S1) hits and stuns opponents, while Speed (S2) gives Volt a decent mobility boost. Meanwhile, his Electric Shield (S3) gives him another shield source, while Discharge (Ult) stuns every opponent approaching him.

Simulation Games For Sci-Fi Fans
From managing colonies to crafting spaceships, here are the best simulation games for fans of science fiction.Volt boasts incredible versatility that makes him reliable even in the endgame. His flexible kit allows players to provide cover to allies, damage multiple enemies at once, and use his other skills to "flow" seamlessly with both his ranged and melee abilities.
11 Mirage
Decoys Maximize Mobile, Hit And Run Tactics

|
Passive |
+85% Slide Duration, +50% Acrobatics Speed |
|---|---|
|
1st Skill |
Hall of Mirrors: Create doppelgangers to confuse enemies |
|
2nd Skill |
Sleight of Hand: Create a jewel that blinds enemies when touched in darkness or create a radial light explosion. Use Hall of Mirrors to create multiple jewes |
|
3rd Skill |
Eclipse: Deal heavy damage while standing in the light, whereas shadows make Mirage difficult to damage and track |
|
Ultimate |
Prism: Release a prism that fires at all directions, use again to detonate and blind nearby enemies |
Players who want to spice things up in their Warframe gameplay should consider using Mirage for some cloning thrills. At its core, Mirage's Passive allows her to get more out of her sliding and acrobatics, letting her zip in and out of battle more conveniently. The core of her kit revolves around Hall of Mirrors (S1) that creates close of herself to confuse enemies, leaving them vulnerable. The Hall also affects Sleight of Hand (S2), which creates a blinding jewel to further distract enemies.
Through Eclipse (S3), Mirage deals decent AOE while making her harder to hit. Lastly, her Prism (Ult) unleashes a multi-directional blind that leaves opponents easier to target. Be it through solo or team plays, Mirage's kit remains fun to use for non-aggressive strategies.
10 Citrine
Outast Foes With Increased Regeneration, Shields

|
Passive |
Nearby allies get +5 Health Regeneration per second. Picking up a Health Orb increases this by +0.1 up to 25 |
|---|---|
|
1st Skill |
Fractured Blast: Inflicts Bleed upon attack, can stagger foes. Status Effect increases the chances of Health and Energy Orb drops |
|
2nd Skill |
Preserving Shell: Use a shell to defend Citrine and her allies, with kills and assists increasing the shell's defenses |
|
3rd Skill |
Prismatic Gem: Summon a gem that shoots prismatic beams to targets of Citrine and her allies. They come with Cold, Electricity, Heat, and Toxin effects |
|
Ultimate |
Crystallize: Summon fractals that seek enemies and paralyze them. Hitting the fractals will cause Critical Damage |
Compared to fellow healer Trinity, the regeneration-oriented healing of Citrine is paired with decent debuffs to foes that cement her team's capability of surviving in long-term engagements in Warframe gameplay. Citrine's Passive gives her and her team boosts to Health Regeneration, specifically when picking up Health Orbs. This pairs up with Fractured Blast (S1), a Bleed-inflicting attack that increases the chance of enemies spawning Health and Energy Orbs.
Meanwhile, the rest of Citrine's kit are also tailored to defense to different degrees. Preserving Shell (S2) is a shield that increases in potency the more players hit it with kills and assists. Meanwhile, Prismatic Gem (S3) aids in offense by firing attacks on Citrine and the tema's targets. Lastly, Crystallize (Ult) can summon stunning fractals that give guaranteed crits to targets when hit, boosting Citrine's overall firepower.
9 Kullervo
Master The Art Of Heavy Attacks With Teleports, Extra Damage

|
Passive |
+75% Heavy Attack Damage, +100% Heavy Attack Wind-Up Speed |
|---|---|
|
1st Skill |
Wrathful Advance: Charge a Heavy Attack and then teleport to the target with a temporary Melee Critical Chance boost. Hold to instead teleport to any marked area |
|
2nd Skill |
Recompense: Daggers surround Kullervo and start hitting enemies, restoring his Health. However, missing an enemy will deal slight damage to him instead. At full health, hitting with Recompnse gives him Overguard |
|
3rd Skill |
Collective Curse: Binds enemies with a curse. When Kullervo damages a cursed enemy, every other cursed enemy takes some damage from the attack |
|
Ultimate |
Storm of Ukko: A rain of daggers fall on enemies |
Players enjoying their Warframe gameplay can spice things up by bashing enemies to oblivion with their Heavy Attacks, with Kullervo specifically taking the lead with his damage-aplification toolkit. Thanks to his Passive, Kullervo can enjoy faster Heavy Attacks with increased damage, allowing him to bring out more pain with the right combos of the rest of his offerings.
With Wrathful Advance (S1), Kullervo can deal Heavy Attacks from almost anywhere, transforming him into a teleporting juggernaut that can get in and out of battle quickly. If he uses Recompense (S2), he releases daggers that heal him on hit or deal damage to him if he misses, demanding some level of precision with players. With Collective Curse (S3), Kullervo's attacks get a free AOE with damage chains, while Storm of Ukko (Ult) rains daggers on enemies for heavy burst damage.
8 Revenant
Enthrall Enemies To Serve In Combat

|
Passive |
Running out of Shields will smash enemies within 7.5m with 100 Damage with knockdown |
|---|---|
|
1st Skill |
Enthrall: Make a target into an ally, and on death they disintegrate into a pillar of energy that damages enemies. The Thrall remains until this skill ends |
|
2nd Skill |
Mesmer Skin: Redirect damage and stun enemies, leaving them open to be enthralled at no cost |
|
3rd Skill |
Reave: Become a wall of Sentient energy and dash through enemies, stealing Health and Energy with enhanced effects for thralls |
|
Ultimate |
Danse Macabre: Eidolon energy erupts around Revenant in a circle. The beams will target selected defenses and incoming damage will heat the beams instead. Holding fire boosts Damage and Status Effects at the cost of more energy. Thralls that are killed will leave Overshield Pickups |
It doesn't bode well for enemies in Warframe gameplay when the likes of Revenant can turn them against each other. Unlike other Warframes, Revenant's kit focuses on transforming enemies into Thralls that fight on his behalf, and easily discarding them when they're of no use. Central to this mechanic is Enthrall (S1) that converts a target into a Thrall as long as the ability is activated.
However, a similar mechanic also exists in Mesmer Skin (S2), a damage redirection and slowing ability that can open targets to be enthralled at no cost. In times of danger, Revenant can use Reave (S3) to dare move towards targets as he can siphon Health and Energy. Lastly, Danse Macabre is a much-needed AOE attack that can selectively bypass targets.
7 Protea
Adapt To The Battlefield With Different Abilities

|
Passive |
Get +100% Ability Strength for every 4th Skill cast |
|---|---|
|
1st Skill |
Grenade Fan: Throw 3 Grenades, either creating a shranpel swirl that deals Slashing damage (Shrapnel Vortex) or become Shield generators (Shield Satellites) |
|
2nd Skill |
Blaze Artillery: Release an artillery unit to attack enemies, with each hit boosting its next attacks |
|
3rd Skill |
Dispensary: Release 3 Pickups in the form of an Empowered Health Orb, an Energy Orb, and Universal Ammo Pack |
|
Ultimate |
Temporal Anchor: Release a Temporal Anchor that rewinds Protea, triggering an implosion. The implosion deals damage based on the damage Protea deals between the Skill's activation and ending. Dying will resurrect Protea as long as the Anchor is active, but it disappears upon the first revival |
Players that want a Warframe that offers up some variety and situational prowess should check out Protea. This interesting and entertaining Warframe is well-rounded, providing players with a toolkit that has it filling a lot of roles in team play while also being a blast to use in solo situations. Unfortunately, its energy pool is a bit low for some and some of its abilities are a bit niche, but it does boast great damage potential.
Protea's Grenade Fan (S1) gives it a solid damaging option that also doubles as a shield should it need extra protection in chaotic fights. Blaze Artillery (S2) is capable of nuking smaller enemies and provides a damage boost to deal with beefier opponents thanks to a power spike it gains for each enemy it hits. Dispensary (S3) can be invaluable for both Protea and their teammates, dropping an empowered health orb, energy orb, and universal ammo pack. One of her best abilities, Temporal Anchor (Ult), works as a damaging ability while also "saving Protea" if they are downed during its execution.
6 Dagath
Amplify Damage With Even More Damage Opportunities

|
Passive |
35% Chance that Dagath receives +300% Health and Energy from Orbs |
|---|---|
|
1st Skill |
Wyrd Scythes: Summon scythes that seek nearby enemies, dealing Viral Damage and Slow and a guaranteed Status Effect. The scythes spread and prolong Doom |
|
2nd Skill |
Doom: Attack with Viral Damage. Absorb part of the damage Dagath deals to them and hit back with Wyrd Scythes |
|
3rd Skill |
Grave Spirit: Deal extra Critical Damage that is doubled on enemies suffering Doom. Assume a Spectral Form to evade fatal lows |
|
Ultimate |
Rakhail's Cavalry: Release Phantom Kaithes that damage all in their path, and lower Defenses of enemies affected by Doom |
Touted as a Warframe capable of wielding malice itself, Dagath stockpiles damages against opponents by magnifying her abilities depending on how much she hits her foes. Much of this is courtesy of Doom (S2) that not only deals Viral Damage through attacks but absorbs part of the damage dealt and reapplies them when Dagath uses her Wyrd Scythes (S1) that seek foes alongside nifty slows and a guaranteed Status Effect.

Best Sci-Fi Roguelikes
Roguelikes are a beloved genre of gaming, and with these games, players can take that genre into the sci-fi field for added fun.Meanwhile, the rest of her kit amplifies the rest of her abilities as long as she inflicts Doom on foes. Grave Spirit (S3) boosts her innate Critical Damage while also giving her an escape against certain death, all the while doubling this skill's attacks on Doomed enemies. Lastly, Rakhail's Cavalry (Ult) will have her summon a horde of Phantom Kaithes that lowers the Defenses of Doomed enemies, leaving them more vulnerable to Dagath and her allies.