Part 4 of Return to Monkey Island is by far the longest in the game, with players needing to complete a wide variety of overlapping tasks by hopping between several different islands and locations. Though the tasks themselves are simple enough on paper, figuring out how exactly to complete them is anything but.
In order to complete Part 4 of Return to Monkey Island, players will need to keep track of multiple objectives, while also solving some of the series' toughest puzzles to date. With the right approach and some careful planning, however, players should be able to find all five Golden Keys without too much trouble.
How to Get Old Mrs. Smith's Golden Key

Upon their arrival at the docks, players should speak with the SCUMM Bar Chef and attempt to take back the cooking book. He's not willing to part with it just yet though, so, for now, players can make their way to the Voodoo Lady's shop and speak with her about the secret. After the conversation ends, heading outside will lead to Guybrush running into Widey Bones, the old lady who could earlier be seen leaning out of a second-story window in the High Street area.

Widey will explain where Guybrush can find the five Golden Keys needed to unlock the secret, one of which just so happens to be in her possession. However, she won't even think about handing it over until Guybrush has found two or more keys, so players should focus on the other four keys for now. Before players start looking for them though, they'll want to head over to Wally's shop and ask him for a Map of the Sea.

Next, players should go to the newly-opened fish shop, which can be found in the High Street area opposite the locksmith. Inside, Guybrush will see a few familiar faces, as well as a red flag once owned by one of the other Golden Key holders, Bella Fisher. Upon asking about the flag, players will learn that it now belongs to a semi-secret society of Anglers known as the Chums. If Guybrush asks to join, he'll be given a special Fishing Lure as well as a bit of advice on storytelling.

Showing this lure to other Chums members and then sharing a story with them will lead to Guybrush being given more story-telling advice. Upon getting advice from five different members, he'll become a high-ranking chum and will be able to take the flag. The first Chum players should speak with is the pirate outside the SCUMM Bar, who'll give some advice on setting the stage. While they're here, players should grab the Exotic Drink to his left before making their way back to the fish shop.

Once there, they can ask the two pirates at the table about the nearby blowfish, which leads to them explaining that they use them for belching contests offering Guybrush a chance to join. Before accepting the invitation, players should take a swig of the Exotic Drink. This will allow them to win the competition with ease, for which Guybrush is awarded a Blowfish. If players wait too long the exotic drink will turn bad, so they may need to head back down to the docks and grab another one if this happens.

As they're already in the neighborhood, players should pay a visit to the locksmith and show her the lure to get some advice on dramatic endings. By taking a look around and chatting with her a little, they can also learn that her mother was none other than Old Mrs. Smith, who just so happened to own one of the five Golden Keys.

Old Mrs. Smith left the key to her daughter in her will, though the locksmith never actually got around to collecting it. As a result, it was scheduled for destruction, as per the Probate Order that she proceeds to hand over to Guybrush. Players should also head over to the jail at this point and ask Otis what happened to Stan as they'll need his help a little later on.

There are no more keys or Chums members on Melee, but there is another one of Bella Fisher's Flags. It can be found at the museum of pirate lore in the display case from which Guybrush stole the eyepatch in Part 1. Players should feed crackers to the two parrots and then quickly use the display case key to steal the Flag. Upon closer inspection though, it appears that this one is a replica, so they'll need to head back inside and look for the real thing.

This time, players should refrain from feeding the parrots so that they alert the museum's curator when Guybrush unlocks the display cabinet. Once this happens, they can quickly make their way to the store room at the back of the museum and swap out the real Flag for the replica they stole a moment or two ago. While here, they can also hand over the book of poems that they got from Gullet in Part 3 to unlock the Promise Keeper achievement.

For now, there's not much else to do on Melee Island, so players should head to the docks and make their way out to sea. They'll want to visit Scurvy Island first and head for the campsite to the north of the island to look for Elaine. She's not there, but players can find a framed Painting and a Note on her desk. The former will come in handy later on, while the latter will reveal her exact location once examined.

After finding Elaine, players should speak with her about the scurvy project to receive the Scurvy Flyer and then grab a few of the nearby Limes. They can also show her the fishing lure to get some advice on how to add additional details to their stories, after which, they'll be good to go. Their next stop is the island of Brrr Muda up in the north, though they'll get stopped at a scurvy inspection checkpoint before reaching the island.

After showing the customs officer that they're carrying limes, players will need to fill out a customs form. Thankfully, it's a lot simpler than it first looks, with players only actually needing to check the fifth and last boxes and then sign it in order to be allowed passage. It's okay to fill out some of the other boxes too, providing players don't check any of the ones that reveal that Guybrush is a pirate.

Once they arrive in Brrr Muda, players should head to the courthouse, which is the building to the far left. They can then show the probate order to the judge (who just so happens to be the guy from the scurvy inspection checkpoint), after which, they'll receive their first Golden Key. Next, they should travel to the island center and pay a visit to the Ice Quarry.
How to Get the Brrr Muda Island Golden Key

Showing the guard here the Chums fishing lure will result in players learning how to use special angling lingo to jazz up their stories a little. They can enquire about visiting Stan in the hard labor camp too, but the guard will require proof that Guybrush and Stan are actually friends, which players won't be able to provide at this point.

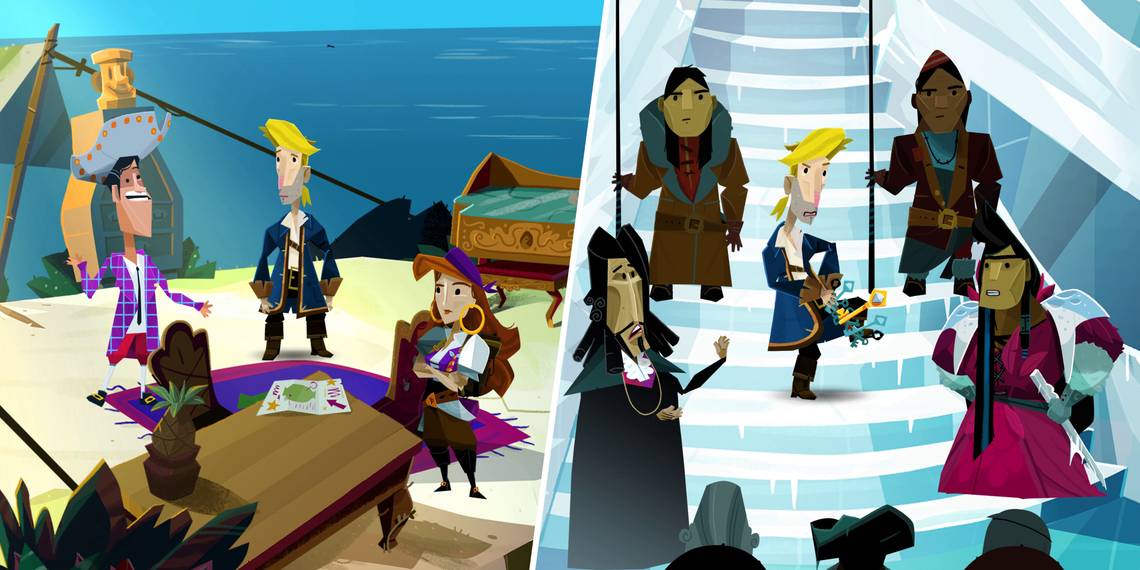
Before leaving Brrr Muda, players should head over to the Ice Castle on the west side of the island. There, they'll be able to find some Firewood and some Matches and also learn about the Queen's Golden Key. If Guybrush asks about becoming queen, he'll be told that he'll need to beat the reigning Queen in three different contests. Though it's impossible to win any of them right away, players should challenge her to one anyway to gain access to the Town Hall. It doesn't matter which.

After losing the challenge, players should make their way to the area at the top of the stairs on the left, which is where the Contest of Intelligence takes place. Before ringing the triangle to begin the contest though, they'll need to place the firewood in the fireplace and then light the firewood using the matches. This will cause the nearby icicle to begin to melt, which will come in useful during the contest.

With the fire now blazing, players should ring the triangle to begin the Contest of Intelligence, which takes the form of a twenty-second algebra test. At some point during the test, a drop of water will fall into the bucket and distract the Queen, providing players with a short window in which to swap the two test papers around without her noticing. Doing so will lead to the mighty pirate winning the contest, much to the dismay of the Queen.

Players won't be able to beat her in either of the other two contests at this time, though they should make a point of visiting the room on the left, which is where the Contest of Heartiness takes place. Here, players will need to read the contest sign behind the table and make a note of what the fish of the day is. It varies from playthrough to playthrough, so they won't be able to look online to find out.

At this point, players should make their way back to Melee Island and head over to the former site of Stan's Previously Owned Vessels where Guybrush found the sponge in Chapter 1. Due to the earthquake that occurred after decrypting the map to the secret, the front of the wooden shack has been completely destroyed, allowing players to grab both the Toothbrush and the Picture that are on the table inside.

Before leaving Melee, players should head back to the fish shop on High Street, where they'll need to ask the proprietor about the fish of the day that was on the contest sign in Brrr Muda. Doing so will lead to players getting a Box of Fish, after which, they'll want to head on over to the Governor's mansion. There, they'll find a long line of people queueing to see Carla and can unlock the Patient Citizen achievement by joining the back of the line and waiting for around five minutes.

Upon heading inside the mansion, speaking with Carla will reveal that the government is completely broke. Players can unlock the Relief Picker achievement by trying to give her some money from Guybrush's coin purse, but to progress the story, they'll instead need to ask about getting a disaster relief IOU and then select the "I want to rebuild local business option" when prompted.

Once they have the IOU, they can give it to the Chef at the SCUMM Bar to reclaim the Cooking Book that they gave him during Part 1. If they then return this to Carla, she'll be happy for Guybrush to borrow another book from the bookshelf, so players should grab a copy of The Endless Tale of the Voyage that Would Not End and then make their way back over to LeChuck's ship.

Here, they can show the lure to Apple Bob to get their last bit of storytelling advice, after which, he'll recommend returning to the fish shop and telling the story to the former pirate leaders. Players can also give Apple Bob their recently acquired copy of The Endless Tale of the Voyage that Would Not End to receive Flambe's Joke Book, which will come in very handy for one of the trials on Brrr Muda. Before heading there though, players should head down to the kitchen and steal Putra's recently-restocked shaker of Demon Pepper.

Guybrush's next stop should be Scurvy Island and the spot with the seagull not far from Elaine's camp. Players should combine the Demon Pepper with the box of fish to obtain Spicy Fish and then throw a chunk of it over to the irate bird. This will cause it to fly away from its nest, allowing Guybrush to nab the Picture of himself that the seagull had been protecting.

Next, players will need to return to the Town Hall in Brrr Muda. First, they should pay a visit to the room on the left and use the box of spicy fish with the bucket and then head back into the main hall and through the door to the north. Ringing the triangle here will begin the Contest of Seriousness, in which Guybrush must make the Queen laugh. After hearing her joke and choosing a sarcastic response, players can use the joke book on the Queen and select any of the options to emerge victorious from the contest.

Before leaving Brrr Muda, players should head back to the Ice Quarry and then examine the picture frame in their inventory. They'll need to put the picture of Stan on the left and the picture of Guybrush on the right and then show it to the guard to get inside. Players can then show Stan Elaine's flyer and then ask him about escaping to receive the Judge's Order. Before leaving through the nearby tunnel, they may want to unlock the Dental Samaritan achievement by giving Stan his toothbrush.

At this point, players should make their way back to Melee Island and visit the former pirate leaders in the fish shop on the High Street. Assuming he's been given advice by all five Chums, sharing a story with the man behind the counter will lead to Guybrush becoming a high-ranking Chum and the Trophy Fisher achievement being unlocked. Players should then ask for the Flag, as well as a replacement Box of Fish.

Observant players may have noticed a small island over to the left of Guybrush's sea map, which is where players should head next. On Barebones Island, they'll meet Stan's former accountant Ned, who really dislikes his former employer. If players show him the Judge's Order, he'll open the nearby chest and hand over a Sachel full of damning evidence. If players leave and then re-enter the area after receiving the evidence, they'll find that Ned is no longer here, allowing them to take his Picture too.

Players can now make their way back to Brrr Muda and pay a visit to the courthouse. Rather than just showing the entire sachel to the judge though, they should instead rummage around inside to receive Stan's Financial Records and Ned's License. They'll then need to combine the latter with the picture frame, placing the license on the left and the picture of Guybrush on the right.

Once everything is ready, players can show Stan's records to the judge and use the framed license to trick him into thinking that Guybrush is actually Ned. Guybrush will then need to sign a legal document confirming that he is who he says he is, after which, the judge will hand over an Extended Sentence for Guybrush to deliver to Stan. Before doing so, however, players should make one final trip to the town hall.

As on two of their previous visits, they'll need to visit the room in which the Contest of Heartiness takes place. This time though, they can actually ring the triangle as they have everything needed to beat the Queen. After she takes one of the spicy fish from the bucket, players should use the fresh box of fish in their industry with Guybrush's plate. He'll only be able to take two bites, but this is more than the Queen, who just cannot handle the spicy Demon Pepper.

Once the contest is over, Guybrush will be crowned Queen of Brrr Muda in front of a crowd of his new subjects. Upon being given the crown of keys though, he tears it into pieces, allowing him to get his hands on the second Golden Key. The Brrr Mudan people aren't too happy with this, but, after Guybrush explains that he's bringing an end to the monarchy and starts handing out keys to regular people, they seem to forgive him pretty quickly.
How to Get Widey's Stolen Golden Key

Before leaving Brrr Muda, players should stop in and see Stan and show him the new Judge's order. Upon learning that he's now facing ten years of hard labor, he quickly changes his mind about escaping, after which, players will be able to use the double monocle with Stan's shackles to get another Serial Number.

Before springing Stan, players should make their way over to Terror Island where there are a few key items that need to be picked up. First, players should go to the Mysterious Clearing area and grab the Lamp. Next, they'll want to go visit the Unlucky Place and grab the Silver Key from the skeleton. Finally, they should head for the Twisting path, where they can use the knife to pry off the Sign from the locked gate.

After removing the sign, players will be able to use the key to open the gate. The area inside is way too dark, but players can use the matches to light the lantern and illuminate the path ahead to reach some twisty passages. It doesn't really matter which way they go here, as the aim isn't to successfully navigate the tunnels, but instead to find the five Curious Notes which explain how to do so.

Once they have all five notes, players should have Guybrush read the writing on the sign which will teleport him back to the gate. Before heading back inside, they should take a look at the notes. Each one has a symbol on it and refers to a season, with one mentioning spring coming again. Players should place these in chronological order (Spring, Summer, Fall, Winter, Spring Again) and then make a note of the symbols.

Once they've figured out the correct order, players should head back inside and navigate through the tunnels with the symbols next to each tunnel corresponding with the order of the symbols on the curious notes. Like many of the other puzzles in Return to Monkey Island, these symbols vary from playthrough to playthrough, so players will need to use the notes in their inventory rather than trying to look online for the exact solution.

Following the tunnels will lead players to something called the Pit of Agony, where players will need to take a leap of faith to their right. This will cause Guybrush to fall into a deep body of water, which will extinguish his lantern and leave him in total darkness. Luckily, reading the writing on the sign again will transport the mighty pirate back to the entrance to the tunnels.

Sadly, regular flames are no match for the water, but the same cannot be said of demon flames. Players should therefore leave Terror Island and pay a visit to LeChuck's ship, where they'll find Flambe sleeping up in the crow's nest. They can then use the lamp together with his head to relight it with water-resistant demonic flames.

While here, players should head down to the hold to look for the Golden Key that Iron Rose stole from Widey Bones a little earlier on. She's hidden it inside a ghost chicken, so players will need nature to take its course. Thankfully, they can speed up the process by feeding it some Chicken Feed from the sack near the ladder and then leaving and re-entering the hold to get the ghost chicken to pass the third Golden Key.
How to Get Bella Fisher's Golden Key

While on the subject of keys, players should pay another visit to the locksmith and hand her the serial number to Stan's shackles to get a Shackle Key. If they happened to get the serial number for the shackles on the deck of LeChuck's ship in Part 2, now's also a good time to hand that over, as having an extra Shackle Key will come in handy during the game's final part.

With the shackle key now in hand, players can return to Stan on Brrr Muda and use it to help him escape. They'll then find themselves back on Scurvy Island, where they'll need to choose between a few dialog options to help Stan redesign Elaine's flyer. Eventually, both stan and Elaine will leave, allowing Guybrush to help himself to the New Scurvy Flyer.

Players should take the flyer to the ship that's adrift in the bottom right-hand corner of the sea map. Speaking to the pirates onboard will reveal that they all have scurvy and won't allow anyone else to board. Handing over the flyer and then a couple of limes will alleviate their concerns, however, allowing Guybrush to climb aboard and help himself to the third and final Bella Fisher Flag. Players can then combine the three flags in their inventory to reveal a new location not far from the adrift ship.

Once at this new location, players will need to lower the anchor and then use the blowfish in their inventory so that it's fully inflated. If they dive into the water, Guybrush will eventually reveal that it's too deep and that he needs to turn back, but inhaling the air in the blowfish here will refill his lungs and allow him to reach the ocean floor. There, he'll find Bella Fisher's Golden Key attached to the front of her ship.
How to Get the Terror Island Golden Key

With four of the five Golden Keys now in hand, players should make their way back to Terror Island and through the gate in the Twisting Path area. They'll be taken directly to the Pit of Agony and should once again dive into the water. Thanks to the demonic flames, the lantern will remain lit this time, allowing players to head to the right and emerge from the water. If they keep on going right, they'll eventually fall off a ledge and down into a deep cave, where they'll find Herman Toothrot and the final Golden Key.

If players attempt to take the Golden Key by force, Herman and Guybrush will end up in a scuffle, which will lead to the lantern being extinguished and the cave being cast into complete darkness. Luckily, Guybrush just so happens to have a magic sign that can teleport him back to the gate, so players should use this to escape. Sadly, he can't take Herman with him.

With all of the keys now in their possession, players will automatically be taken back to Melee Island and should make their way to the voodoo shop. They can then use the five keys to unlock the cabinet, inside of which is a locked chest containing the secret. Try as he might though, Guybrush is unable to open it, and, after a while, LeChuck and his cronies show up and take it for themselves.

After counting to a hundred (or at least pretending to), Guybrush will attempt to follow them, though before he can leave, Elaine shows up. Following a short conversation, she agrees to accompany Guybrush to the bowels of Monkey Island where the chest containing the island's secret must be opened. This brings part four to an end and the final part of Return to Monkey Island will begin.
Return to Monkey Island is available now on PC and Nintendo Switch.