Rockstar Games' hit sequel Red Dead Redemption 2 has continued to draw in fans since its long-awaited release in 2018, largely due to a strong and growing online community as well as the replayability factor of the main campaign. This perfectly understandable considering that it's filled to the brim with missions, encounters, hunting, collectibles, and of course, treasure maps.
Earlier games in the Red Dead series featured a connected series of treasure maps that led into the next challenge with each new find. However, RDR2 individualized each treasure map mission with a number of connected clues that we'll take a close look at today as we look at RDR2's treasure maps and where to find them on your next trip to the Wild Wild West.
RELATED: 10 Mistakes Everyone Makes While Playing Red Dead Redemption 2
Updated on April 30, 2021 by Scoot Allan: While there are a number of profitable ways to make money in the incredibly popular Red Dead Redemption 2 and the ongoing Red Dead Online, one of the most on-brand ways is the ability to find treasure maps and hunt down heaps of gold. Of course, Rockstar Games doesn't just give money away to fans so you'll have to work hard to first find all of RDR2's treasure maps and then navigate the clues and pitfalls to find the reward. To make it a bit easier for players to increase their billfold, we've added a few more tips and tricks to help find Red Dead 2's treasure maps and your way to some of the biggest paydays in Red Dead Redemption 2.
14 Jack Hall Gang Treasure Map

The various treasure maps of Red Dead Redemption 2 can all be found in different ways that vary in difficulty, though one of the easiest comes from a random encounter near Flatneck Station. Standing on a ridge and looking out over the beautiful valley is a man named Maximo who will offer to sell you the Jack Hall Gang Treasure Map. Though you can also kill and rob him to acquire the map or pick it up from a fence later on in the game.
The first map will take you to a recognizable landmass called Caliban's Seat north of Valentine, which will require players to maneuver down a path that requires you to run and leap between the ledges along the ridge of the mountain to reach the hiding spot. In turn, this will reveal the second part of the map that will lead you to Cotorra Springs in Ambarino. The second map is hidden in a rock formation located in the springs, which will direct players to a rocky island in the middle of the lake at O'Creagh's Run — which hides the final reward.
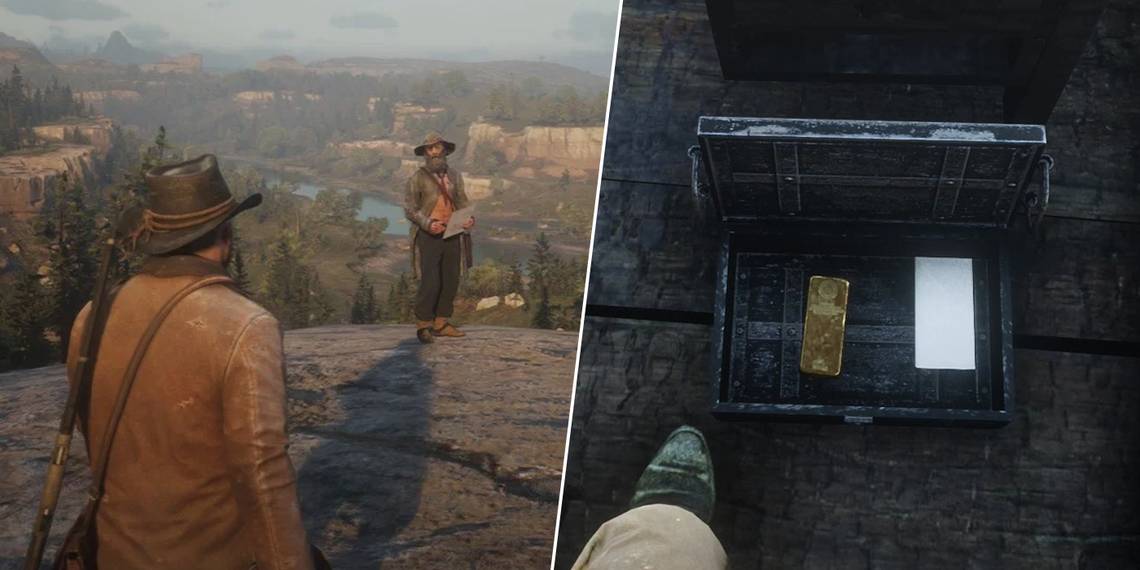
13 Tips & Payday

• You need to have set up camp at Horseshoe Overlook after Chapter 2 in order to access the first treasure hunter
• Inspect every map you find for a visual clue to direct you towards key locations
• Climb Caliban's Seat from the south-east to find the trail referenced in the map easier
• Stand in the second "O" of Cotorroa and search the rock formation with a flat top near the geyser for the second map
• WORTH: 2 Gold Bars = $1, 000
12 High Stakes Treasure Map

The High Stakes Treasure Map can be found after Chapter 3 during a random encounter with a treasure hunter somewhere between Cumberland Falls and Wallace Station, though the muttering Stranger's location can change over time. The first map will lead you to a path behind Cumberland Falls to find a second map that points towards Barrow Lagoon north of Valentine, where another map can be found in the hollow of a tree.
The final hunt can be challenging as the map doesn't offer many details besides the Baccus Station starting point, north of Fort Wallace (near the "S" of Station), which players can use to find the beginning of the path at the top of the hill. Once on the path, you will have to navigate a series of jumps between rock ledges and sprinted scrambles up slippery rock faces that will eventually take you to the hidden nook and the golden reward.
11 Tips & Payday

• The Stranger won't appear on your mini-map like other encounters, so listen for his odd mumbling when nearby
• You will have to rob or kill him for the High Stakes Treasure Map
• Approach from the eastern side of the waterfall and swim across to the path
• Use the log to climb behind Cumberland Falls to find the second map
• Dress warmly for the trip up to the Western Grizzlies
• Walk along the log bridge at Barrow Lagoon to find the hidden nook with a third map
• Head up the big hill west of the "S" in Baccus Station to the east of Fort Wallace
• Find the path in between the two peaks of the hill that faces the railway bridge in the distance
• You'll have to carefully move along sloped rocks that might require you to sprint before jumping onto a ledge and crouching to find the hidden nook
• WORTH: 3 Gold Bars = $1,500
10 The Poisonous Trail Treasure Map

One of the trickiest treasures to locate can be discovered using the Poisonous Trail Treasure Map, which can only be found in a cabin at Cairn Lake. The first map will point players towards a burnt tree stump near Face Rock in Lemoyne, which can be found to the right of the "R" and "L" of Scarlett Meadows. You will then be directed to a winding path west of the Van Horn Trading Post that can be accessed from the main branching road south of Van Horn.
Players will have to spot a grassy hill with a coiled rocky mound on the top with the third map, which will direct you to a hidden cave behind a waterfall in Elysian Pool near the "E" of Hanover. You will have to navigate the potentially confusing tunnel system to find a nearly hidden entrance in the cave wall that will take players on an underground journey to the final treasure. It will take a keen eye to notice hidden ledges, and risky jumps that could end in death, so save often before you find the final treasure and escape from the hidden cave system.
9 Tips & Payday

• The map can be found early, though players will also visit the cabin during the Flaco Hernandez Gunslinger mission
• Look under the bed in the furthest cabin to find a lockbox with the map
• The withered tree in Scarlet Meadows is near a fallen log at the base of the hill leading up to Face Rock
• Look for a tower you can climb near the road going towards the Kamassa River to find the winding mound and snake geoglyph
• Follow the first corridor in the hidden cave system until you reach a sloping ledge on the right you can walk down to find a small hole
• Crouch and stay to the right to find the hidden cave entrance
• Stay right when facing a fork in the tunnel to find an abandoned campsite with a lockbox
• Look to the left when you reach a large drop to find a hard to see a ledge that you'll have to run and jump to land on
• Walk up the slope to slide down into a pool of water where you'll find a ledge with rocks that contain gold
• WORTH: 4 Gold Bars = $2,000
8 Torn Treasure Maps

While most treasure maps lead players to a cache of golden bars, the pair of Treasure Maps that can be put together after encountering two hermits will take players to a different type of reward, the legendary revolver of gunfighter Otis Miller. The first hermit lives in a cabin in Manito Glade to the north of Annesburg, and players can find not only the first half of the Torn Treasure Map but also the powerful Rare Shotgun after killing the hermit and looting his home.
The second hermit is near the end of the Little Creek River northwest of Wallace Station in West Elizabeth. The hermit and her dogs may prove to be a challenge, but the map will be found in a drawer in her house after taking them out. Once put together, the Torn Treasure Maps will lead players to a cave in Cholla Springs near the Rattlesnake Hollow state line, rewarding players with the specialty revolver and a few racy pictures.
7 Tips & Payday

• It doesn't matter what order you decide to find and kill the hermits
• Manito Glade is almost as far east as you can go above the map, north of Annesburg but west of the train tracks
• You cannot get the Rare Shotgun if you don't pick it up after killing the Manito Glade hermit
• The first half of the map is located in a drawer near the fireplace
• The female hermit's cabin is in the woods to the right of Little Creek River if you follow it to the end
• Head northwest of Armadillo after completing the map until you reach the end of the map
• Search along the boundary of the map until you find the hidden cave
• WORTH: Rare Shotgun, Otis Miller's Revolver and a few erotic snapshots (not of Otis)
6 Le Tresor Des Morts Treasure Map

Fans who pre-ordered the Ultimate and Special editions of Red Dead Redemption 2 received the additional Le Tresor des Morts Treasure Map, which can be found after the "Eastward Bound" mission prior to Chapter 2. The first map can be found in the small burned-out town of Limpany near the Horseshoe Overlook camp in one of the two remaining buildings. It will direct players to the docks of Saint Denis.
There you will have to locate the specific dock and stairs to find your way along the water to metal doors and an underground passage that house the second part of the map at a beam marked with an X. The revealed clue features a riddle that should take players on a short horse ride to the graveyard in Saint Denis, where a small building with stained glass windows can be found with a huge golden reward waiting inside.
5 Tips & Payday

• Search the Sheriff's Office in Limpany to find an additional Gold Bar
• The map is located in the right-hand cell of the Limpany jailhouse
• Find the Cornwall Co. Freight Station in Saint Denis and head down the steps near the docks
• Drop into the water and follow the edge of the dock to locate a steel gate and underground passage
• The riddle references the dead staying dry, which is a clue to head toward the Saint Denis graveyard
• The riddle also features a sketch that references the stained glass window in the cemetery
• WORTH: 1 Gold Bar (optional) + 6 Gold Bars = $3, 500
4 The Elemental Trail Treasure Map

When Red Dead Redemption 2 launched on PC, fans were given the PC-exclusive Elemental Trail Treasure Map, which can only be found during the epilogue as it requires access to New Austin and other areas blocked during the main story of the game. The first map can be taken from a corpse that has to be shot down from a hanging rope near the Sea of Coronado, directly west of the "N" in New Austin.
The map will then guide players towards a broken chimney located south of Armadillo, near the San Luis River to the east of Lake Don Julio. The chimney's map will then direct you towards an elevated pathway and water tower located at Benedict Point, southeast of Tumbleweed. Players will have to climb up and walk along the conveyor belt to find the next map, which will then lead to a grave in Coot's Chapel just southeast of Armadillo. The treasure will be found in the grave under a wooden cross.
3 Tips & Payday

• Open your map to locate the "X" that signifies a corpse is nearby when at the Sea of Coronado
• You'll find the broken chimney on land just above the "A" in San Luis River on the map
• Benedict Point is a train station that can be located by tracing the railways on the map
• Follow the gutter near the water tower to find the jump to the wooden conveyer belt
• Coot's Chapel is located directly at the bottom of the "T" in New Austin
• Look for the wooden cross indicated on the treasure map under a tree to find the grave
• WORTH: 1 Gold Bar and a Crow's Beak Trinket to increase ammo loot by 10% = $500
2 The Landmarks of Riches Treasure Map

Another exclusive made available to PC fans was the Landmarks of Riches Treasure Map. It can be completed after Chapter 2 and the discovery of the first map at the Obelisk past Owanjila lake, west of Strawberry near the state line.
The first map will then lead players across the entire map of RDR2 to unique locations and landmarks. These include the tiny church in Lemoyne, the mysterious Hill House near Fort Wallace, the final clue at the empty battlefield of Bolger's Blade which will take players to the Sundial on Mount Shann. A huge reward awaits — one of the biggest treasures PC players can find in Red Dead Redemption 2.
1 Tips & Payday

• The Obelisk in Big Valley can be found near the farthest ends of the map north of Owanjila lake
• Jump on top of the tiny church near Lakay to find the second map in the bell
• The map shows a turtle with a hole in it and loose boards, which references the Cehloniansymbol on the Hill House
• Find the broken window on the right side of the building for the third map that shows a cannon and a tree with a hole in it
• The final clue can be found just south of the second "L" in Bolger's Blade
• The clue reveals a mountain and clock that point's towards Mount Shann in West Elizabeth.
• You will have to eventually leave your horse and climb on foot to the top of the mountain to find the sundial
• WORTH: 6 Gold Bars = $3,000