Debuting with the launch of Overwatch 2 is the brand-new game mode 'Push', a distance-sensitve objective in which teams must escort a barrier-pushing robot to the enemy's spawn. Albeit a rather tedious and dreaded mission type, there is still room to learn the ins and outs of this controversial mode.
With only three map locations currently holding the Push title, fans of the lucrative FPS (First-Person Shooter) can be assured countless triumphant victories once they lock down these effective and useful tips.
6 Communicate

Like any other competitive title, Overwatch 2's challenging matches require one key aspect in order to win, communication. Without pinging enemies that are flanking, ordering the team to group up together, and most notably asking for support in the form of healing, dedicated teams will crumble under the opposition's pressure, rendering them helpless against a heavily coordinated team.
Although the Push mode is a new addition to the beloved franchise, communication among teammates is not, as this should be a stricken attribute every team has, regardless of the objective at hand. With an enhanced availability to pursue flanking routes, narrower fighting spaces when fierce teams collide in the center, and countless opportunities to be shot at from positions of high ground, some argue that communication has never been more important than on the Push objective.
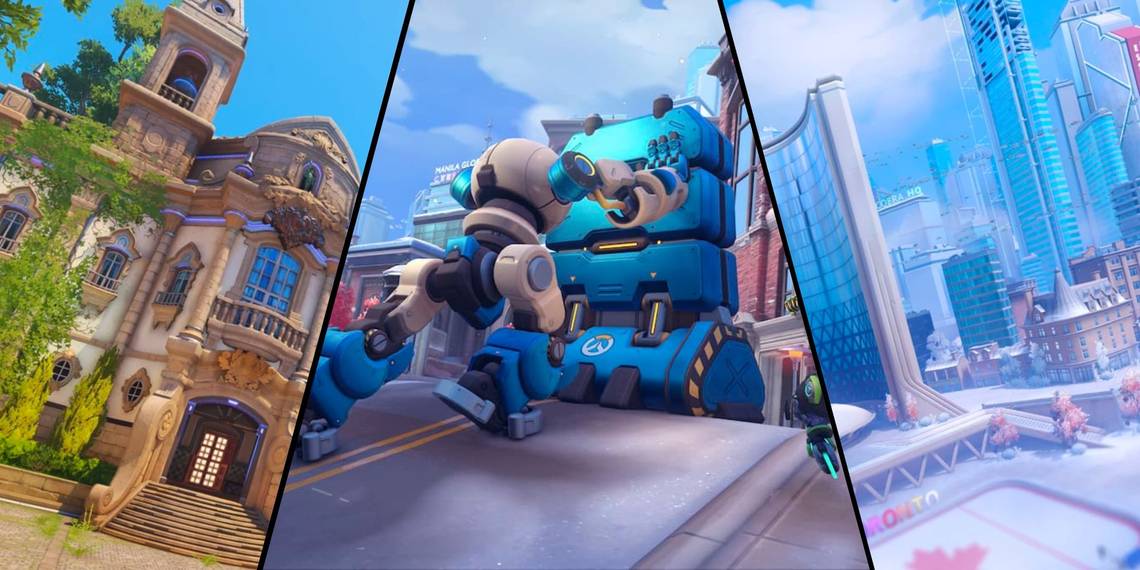
5 Stick With The Robot

Similar to the Escort objective fan know and love, it is easy for players to stray away from the goal at hand, most commonly due to team fights, overextending too deep into enemy lines, or simply chasing up on loose stranglers that got away. However, much like the Payload, the new TS-1 Robot needs committed gamers in its proximity in order to move forward and push the barrier.
As previously mentioned, Overwatch 2's newly instated mode is a distance-sensitive one, meaning fans of the frivolous franchise must ensure they are prioritizing pushing the TS-1 Robot as far as possible over anything else. While the temptation is there to focus on eliminating enemies, players will soon find themselves climbing the competitive ladder in no time if they solely zoned in on chauffeuring the barrier-pushing machine.
4 Utilize The Robot For Cover

While many may think they could find better options on the battleground, the TS-1 Robot actually provides one of the most useful pieces of cover the contentious mode has to offer, especially throughout the more open areas of the map. Not only is this futuristic piece of machinery immensely tall, but the barrier in which it pushes is significantly wide, offering up a large blockade against incoming damage.
Seeing as there are many nooks and crannies among the three Push maps, gamers are spoiled for choice when it comes to shielding themselves from the enemy's line of sight, yet the TS-1 Robot acts as a consistent piece of shelter that grants cover throughout the entirety of the match, making it a necessity for defense when colliding with the enemy team.
3 Track Enemy Ultimates

There are certain tactics that set the higher ranks apart from the lower ranks, one of which is tracking the enemy's ultimate abilities. More often than not, players tend to skip their kill cams once they have been relinquished back to their spawn, however, what they might not realize is that they can see the enemy's ultimate ability charge, allowing them to communicate with their teammates to prepare and play accordingly.
Having the upper hand in an Overwatch 2 match is everything, so knowing which enemy will soon have, or already does have their ultimate ability could be the deciding factor between a jubilant victory or a crushing defeat. With that said, gamers should be on the lookout for this game-changing ability in order to delegate whether to play in a more offensive of defensive manner.
2 Utilize High Ground

Synonymous with both cramped and open areas to fight in are the three maps within the Push mode pool, being that of Esperança, New Queens Street, and Colosseo, however, a similarity that all of these locations share is their abundance of high ground. Mainly beneficial for the DPS (Damage Per Second) and Support roles, these positions of high ground offer up a clear overview and line of sight of the battlefield, also often including an easy escape route.
Utilizing this elevated position not only puts players at an advantage in terms of height, but also increases the enemy's difficulty in terms of fighting back, as they must look up instead of focusing on the objective at hand. Typically, situating one DPS on a position of high ground places great strain on the enemy's ability to push the TS-1 Robot, allowing the player's team to swoop up some easy picks on the lower level.
1 Utilize Flank Routes

Facing a team head on can already seem like a challenging bid to begin with, yet having enemies run rings around a team's Support players in the back lines totally deteriorates their overall coordination. With countless routes at hand, flanking has never been easier than on the controversial Push mode, allowing DPS heroes such as Sombra and Tracer, Tank heroes such as Wrecking Ball and Doomfist, and Support heroes such as Lucio and Moira to take their enemy's by absolute surprise.
Since the main objective is to push the TS-1 Robot forward, it can be quite confusing for the enemy team when they have to fight with their backs to the mobile machine, discombobulating and tarnishing their plans of action. If executed correctly, fans of the renowned franchise will be able to go undetected behind their opposition, rendering them hopeless and distracted, while their comrades secure the victory.