There are plenty of great armor sets in The Legend of Zelda: Tears of the Kingdom, many of which provide their own unique bonuses and buffs. However, the very best armor in Tears of the Kingdom finds ways to set itself apart, either by introducing brand-new gameplay mechanics or providing bonuses so valuable that no other armor set can come close to matching them.

Zelda: Tears of the Kingdom - Every TotK Armor Set (& How to Get Them)
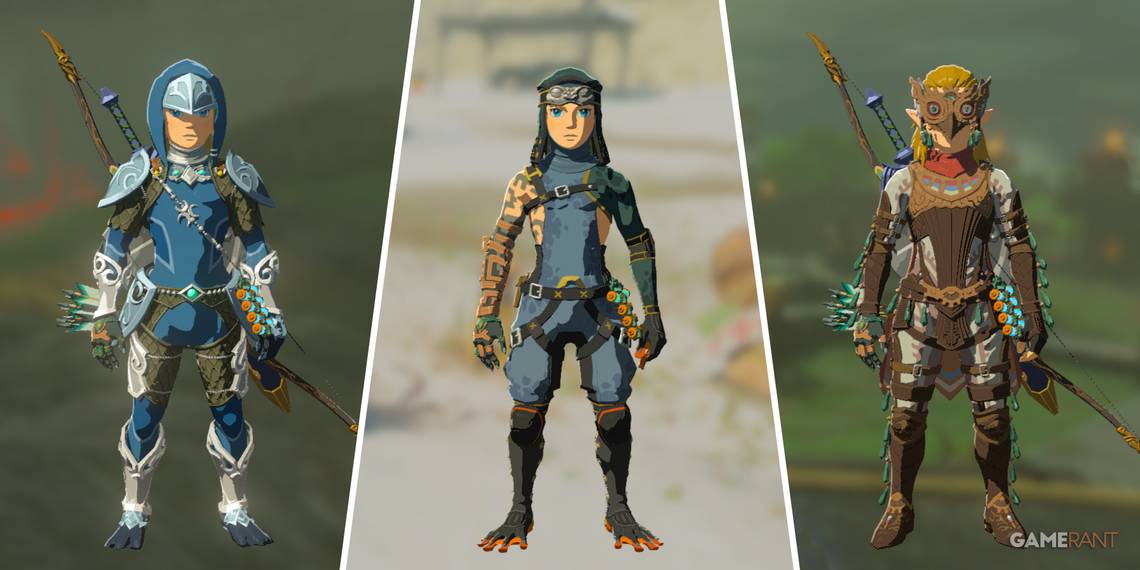
TotK armor sets come in all shapes and sizes, providing players with plenty of options as they navigate the dangers that lay before them in Hyrule.As is often the case in video games, the best armor sets in The Legend of Zelda: Tears of the Kingdom are situational to a certain degree, as certain buffs are a lot more useful in certain settings. However, by seeking out and upgrading the following armor sets, Tears of the Kingdom players should find themselves set for just about anything that the game has to throw at them.
Updated April 11, 2023, by Tom Bowen: The best armor TotK has to offer can make a huge difference to a playthrough. Some sets grant unique abilities, while others allow Link to safely explore unhospitable areas that would otherwise cause him damage. However, to truly get the best out of their armor, players will need to upgrade it with the help of the great fairies. With this in mind, this guide has been updated to provide details of how to upgrade all of the best armor in TotK sets as well as more concise instructions on how to find them. Quick links have been tidied up a little as well, making it easier than ever before to navigate through the best TotK armor.
Quick Links (Best Armor TotK)

|

|

|

|

|

|

|

|

|

|
10 The Phantom Armor

One of several sets introduced in the Master Trials DLC for Breath of the Wild, the Phantom Armor is one of the best-looking armor sets in Tears of the Kingdom. Unfortunately, it can't be upgraded, which does hold it back a little in the long run, but when it comes to base stats, it offers twice as much defense as the nearest contender as well as a pretty decent Attack Up bonus. This makes it ideal for the opening stages of the game or for those who lack the patience to upgrade other sets.
How to Get the Phantom Armor in Tears of the Kingdom
To get the Phantom Armor, players will need to visit the Tamio River Downstream Cave, which is to the east of the Gerudo Highlands Skyview Tower at coordinates -2917, -0798, 0010. The Phantom Greaves can be found in a chest in the Ancient Altar Ruins in the East Barrens area of the Gerudo Desert, which can be reached by walking into some quicksand at coordinates -2519, -3723, 0004. Finally, the Phantom Helmet is in the Puffer Beach Overhead Cave to the south of the Faron Grasslands, the entrance to which is directly above the spot with coordinates 0289, -3833, 0003.
How to Upgrade the Phantom Armor in Tears of the Kingdom
It is not possible to upgrade the Phantom Armor in Tears of the Kingdom.
9 The Soldier's Armor

Like the Phantom Armor, the Soldier's Armor set can be obtained very early on and is a great option for those worried about defense. Granted, it only offers half as much protection as the Phantom Armor to beging with, but once fully upgraded, it is the joint best armor in Tears of the Kingdom when it comes to raw defense. This makes it the perfect set for those who plan on upgrading their armor as they progress through the game.
How to Get the Soldier's Armor in Tears of the Kingdom
Unlike a lot of the other armor sets in Tears of the Kingdom, the three pieces of the Soldier's Armor are all in the same location; that being the Royal Hidden Passage. Players can find the entrance to the passage beneath a trapdoor at the coordinates -0329, 0799, 0076, which is right by the Guard's Chamber. By following this passage, they'll find chests containing the Soldier's Armor (-0267. 0638, -0035), the Soldier's Greaves (-0307, 0281, -0006), and the Soldier's Helm (-0230, 0467, -0039).
How to Upgrade the Soldier's Armor in Tears of the Kingdom
|
Level |
Defense |
Upgrade Materials |
|---|---|---|
|
- |
4 |
|
|
★ |
7 |
|
|
★★ |
12 |
|
|
★★★ |
18 |
|
|
★★★★ |
28 |
|
8 The Armor of the Depths

The Armor of the Depths can be very useful in certain situations, but only after players have upgraded it a few times. It provides several hearts of Gloom Resistance, which can come in extremely handy while exploring the depths, as too can its Gloom Attack Resist set bonus. It's far too situational to compete with the very best armor sets in Tears of the Kingdom, but for those hunting Poes or anyone looking to farm some Zonaite, it's well worth seeking out.
How to Get the Armor of the Depths in Tears of the Kingdom
In order to get their hands on the Armor of the Depths, players will need to find six of the seven Bargainer statues down in the depths. Finding two statues will allow them to purchase the Tunic of the Depths for 150 Poes, while finding four will unlock the Gaiters of the Depths for 200. Once they've found the sixth statue, players will be able to complete the set, with the Hood of the Depths becoming available for 300 Poes.
How to Upgrade the Armor of the Depths in Tears of the Kingdom
|
Level |
Defense |
Upgrade Materials |
|---|---|---|
|
- |
3 |
|
|
★ |
5 |
|
|
★★ |
8 |
|
|
★★★ |
12 |
|
|
★★★★ |
20 |
|
7 The Zora Armor

The Zora Armor not only offers players an impressive 60 defense once fully upgraded but also allows players to swim up waterfalls by tapping the A button when near. If that weren't enough, it also increases the player's swim speed, and, when all three pieces of the set are equipped, decreases the amount of stamina consumed by performing a swim dash,
How to Get the Zora Armor in Tears of the Kingdom
In order to get the Zora Armor, players will need to begin the Sidon of the Zora main story quest. After reuniting with Sidon, they should return to Zora's Domain and speak with Yona, who'll ask Link to find her an Ancient Arowana. If players catch one of these fish in the fountain at Misha's Court and then return it to Yona, she'll give Link the Zora's Armor chest piece, which they'll be needing a little later on.
To get the Zora Greaves, players should return and speak with Yona after fully completing the Sidon of the Zora quest, which will trigger a side quest called A Token of Friendship. This involves players heading down to the Ancient Zora Waterworks, where, after defeating a Stone Talus, they'll be able to find the Zora Greaves in a chest behind a waterfall, the coordinates of which are 3586, 0247, -0103).
Those hoping to get the Zora Helm should speak with Chroma and Khira, who can be found at Zora's Domain after completing the Water Temple. This will trigger another side quest called The Never-Ending Lecture, which sees players returning to the Floating Scales Island that they visited earlier during the Sidon of the Zora main story quest. Here, they should walk along the edge of the island and look for a cave down beneath them cut into the side of the island itself. Inside this cave, they'll find a chest containing the Zora Helm. The coordinates are 4096, 0527, 0586.
How to Upgrade the Zora Armor in Tears of the Kingdom
|
Level |
Defense |
Upgrade Materials |
|---|---|---|
|
- |
3 |
|
|
★ |
5 |
|
|
★★ |
8 |
|
|
★★★ |
12 |
|
|
★★★★ |
20 |
|
6 The Frostbite Armor

Tears of the Kingdom players hoping to survive the cold are going to need to dress appropriately, and the Frostbite armor set is about as appropriate as they come. It makes Link's attacks stronger in colder environments, providing a significant boost to attack power and charge speed together with a very respectable Defense stat. The Snowquill Armor does offer a slightly better Defense stat and provides the Unfreezable set bonus too, but the Frostbite Armor's ability to turn a weakness into a strength arguably makes it the better of the two sets, particularly for more offensively-minded players.
How to Get the Frostbite Armor in Tears of the Kingdom
The Frostbite Shirt is in the Brightcap Cave in the Tabantha Frontier area, the entrance to which is around -3006, 1617, 0195. If players follow the cave, they'll eventually come to some brambles, and burning these away with a Fire Fruit arrow will allow them to reach a chest containing the shirt.
Players can get the Frostbite Trousers in the Hebra Headspring Cave, which is also in the Tabantha Frontier at coordinates -2895, 2509, 0393. Once inside the cave, they'll want to look for a hole in one of the ice walls and then climb inside to find the chest containing the trousers.
Last but not least, the Frostbite Headdress can be found in the Lake Kilsie Cave deep in the Hebra Mountains (-3930, 2860, -0015). Players will need to ride the gust of wind up and look for a blocked-off pathway coming off the side of the vertical shaft. Destroying this wall will grant access to the chest containing the headdress.
How to Upgrade the Frostbite Armor in Tears of the Kingdom
|
Level |
Defense |
Upgrade Materials |
|---|---|---|
|
- |
2 |
|
|
★ |
4 |
|
|
★★ |
6 |
|
|
★★★ |
9 |
|
|
★★★★ |
16 |
|
5 The Ember Armor

Like the Frostbite Armor, the Ember Armor can be incredibly useful when it comes to dealing with extreme weather conditions. It's arguably the better of the two sets though, as players are much more likely to find themselves in warm weather situations down on the surface and while exploring Hyrule's depths. The Desert Voe set provides a worthy heat-resistant alternative, offering slightly better defense and Shock Damage resistance to boot, but the Ember Armor's ability to boost attacks while in warmer surroundings just about gives it the edge.
How to Get the Ember Armor in Tears of the Kingdom
Players can find the Ember Shirt in a chest in the Goronbi River Cave, which is in the Eldin Canyon area. The entrance to the cave is at 1412, 2116, 0287 and the chest itself is at 1378, 2225, 0293. To reach it, they should follow the path around to the right, using Recall on the floating platform to get across the lava. They'll then want to create a new floating platform to the right of the Like Like by shooting a Splash Fruit arrow into the lava. After riding this for about fifteen seconds, they can jump over to the path on their right and follow it up to the chest.
For the Ember Trousers, players should head to the Cephla Lake Cave, which is again in the Eldin Canyon and can be found at the coordinates 2580, 1335, 0153. After speaking with Domidak and Prissen at the cave's entrance, the trousers can be found in one of the many chests on the left-hand side of the cave.
As for the Ember Headdress, players will need to pay a visit to the YunoboCo HQ South Cave (1711, 2715, 0402) and look for a destructible wall to their right not far from the entrance. Behind this wall, they'll find a broken car with a control stick and a few wheels nearby. After repairing the car, they can use the Zonai Device to drive across the lava pool in the previous chamber, allowing them to reach the chest (1589, 2756, 0381). It's right by two glowing turquoise-colored stones.
How to Upgrade the Ember Armor in Tears of the Kingdom
|
Level |
Defense |
Upgrade Materials |
|---|---|---|
|
- |
2 |
|
|
★ |
4 |
|
|
★★ |
6 |
|
|
★★★ |
9 |
|
|
★★★★ |
16 |
|
4 The Froggy Armor

There's nothing more frustrating than when it starts to rain just as players are preparing to climb a steep cliff face or a mountain. Due to the wet weather, Link is unable to maintain his grip, and although there are items that can make climbing in the rain possible, players may not always have these items to hand. Thankfully, with the Froggy Armor, they won't have to, as the set makes it almost impossible for Link to slip while climbing up wet surfaces.
How to Get the Froggy Armor in Tears of the Kingdom
To get the Froggy Armor set, Tears of the Kingdom players will need to complete the "Potential Princess Sightings!" side quest, which is triggered by speaking with Traysi and Penn at the Lucky Clover Gazette office in Tabantha Frontier (3257, 1763, 0119). She'll ask Link to investigate potential sightings of the missing princess, which means visiting a series of different locations around the map.
Players will need to visit the stables listed below and complete a series of side quests for Penn. They're all relatively straightforward and can each be completed in just a couple of minutes. Players will get the Froggy Sleeve once they've finished their fourth side quest and the Froggy Leggings once they've completed their ninth. After completing all twelve side quests, they can return to Traysi at the Lucky Glover Gazette Office, who'll reward them with the Froggy Hood, which is the final piece of the Froggy Armor set.
- Dueling Peaks Stable (1758, -1925, 0039)
- Foothill Stable (2583, 1153, 0147)
- Gerudo Canyon Stable (-2814, -2237, 0029)
- Highland Stable (0507, -3442, 0047)
- New Serenne Stable (-1346, 0735, 0085)
- Outskirt Stable (-1410, 1291, 0032)
- Riverside Stable (0385, 1045, 0015)
- Snowfield Stable (-1640, 2581, 0233)
- South Akkala Stable (3162, 1716, 0201)
- Tabantha Bridge Stable (-2911, 0523, 0169)
- Wetland Stable (0874, 0157, 0025)
- Woodland Stable (1047, 1146, 0022)
How to Upgrade the Froggy Armor in Tears of the Kingdom
|
Level |
Defense |
Upgrade Materials |
|---|---|---|
|
- |
3 |
|
|
★ |
5 |
|
|
★★ |
8 |
|
|
★★★ |
12 |
|
|
★★★★ |
20 |
|
3 The Glide Suit

Gliding with Link's Paraglider is a great way to get around, but the fact that it uses up stamina can make traveling longer distances a lot more difficult than it needs to be. The Glide Suit changes all this though, allowing players to maneuver through the air without using up their precious stamina. As an added bonus, while wearing all three pieces of the set, its Impact Proof ability completely negates all fall damage.
How to Get the Glide Suit in Tears of the Kingdom
To obtain the Glide Shirt, players should make their way to the top of Courage Island (-2213, 0935, 1640), which is above the Lindor's Brow Skyview Tower. From here, they'll need to activate the glowing green gateway and then twice complete a mini-game in which Link must fall through a series of green rings. Players can then get the Glide Tights and Glide Mask by completing similar mini-games over on Bravery Island (0228, 2014, 0758) and Valor Island (4471, -0840, 2624) respectively.
How to Upgrade the Glide Suit in Tears of the Kingdom
|
Level |
Defense |
Upgrade Materials |
|---|---|---|
|
- |
2 |
|
|
★ |
4 |
|
|
★★ |
6 |
|
|
★★★ |
9 |
|
|
★★★★ |
16 |
|
2 The Armor of the Wild

There are plenty of armor sets that are inspired by previous Legend of Zelda games in Tears of the Kingdom, but the Armor of the Wild is arguably the pick of the bunch. Granted, the Armor of Awakening set does look pretty cool and offers the same Attack Up set bonus when all three pieces of the set are equipped. However, when fully upgraded, the Armor of the Wild's 84 defense makes it the best retro armor when it comes to practicality and thus one of the best armor sets in Tears of the Kingdom.
How to Get the Armor of the Wild in Tears of the Kingdom
Players will find all three pieces of the Armor of the Wild down in the depths, though they'll need a heat-resistant armor set in order to do so. The Tunic of the Wild can be found in a chest in the Gerudo Dark Skeleton area (-4877, -3720, -0458), while the Trousers of the Wild are in a chest in the Eldin Dark Skeleton area (1672, 3721, -0561). Finally, players can find the Cap of the Wild in a chest in the Hebra Dark Skeleton area (-3956, 3724, -0858).
How to Upgrade the Armor of the Wild in Tears of the Kingdom
|
Level |
Defense |
Upgrade Materials |
|---|---|---|
|
- |
4 |
|
|
★ |
7 |
|
|
★★ |
12 |
|
|
★★★ |
18 |
|
|
★★★★ |
28 |
|
1 The Zonaite Armor

Zonai devices are incredibly important when it comes to navigating the huge open world of Tears of the Kingdom. With this in mind, Being able to improve the efficiency of Zonai Devices and speed up the rate at which Energy Cells recharge is incredibly useful and is a big part of what makes the Zonaite Armor the best armor set in Tears of the Kingdom. As an added bonus, the full set grants a massive 84 defense when fully upgraded, which no other set can beat outright.
How to Get the Zonaite Armor in Tears of the Kingdom
Players will be able to get the Zonaite Waistguard by heading to the Zonaite Forge Island in the East Necluda Sky and interacting with the green gateway at coordinates 2425, -1678, 1475. They'll then need to use the wind turrets together with Link's Paraglider to make their way to the very top of the island, where they'll be able to drop down a Mission Impossible-inspired tunnel and into a pool of water below. Here, they'll find the Yansamin Shrine, and, behind it, above a pool of lava, a spot where they can use Link's Ascend Ability to get to an area containing a chest. To reach this spot, they'll simply need to throw a Splash Fruit into the lava to create themselves a platform on which to stand.
For the Zonaite Shin Guards, players should make their way to the Sky Mine in the Akkala Sea Sky (4490, 2102, 1155). Interacting with the green gateway here will activate a launcher a little further ahead, and players can use this to reach an island floating above them. Once they land, they'll want to spin the wheel anti-clockwise a little and then use the next launcher to reach yet another island. This time, they should turn the wheel until the launcher is facing the giant Death Star-like sphere above them then fire one of the large cubes so that it goes into the hole in the sphere. After making the shot they can follow the cube into the sphere and place it on the floor tile. This will cause the sphere to begin rotating, at which point, players can use Link's Ascend ability to get on top of it and then glide around the side of the sphere until they see an opening with a chest inside.
For the Zonaite Helm, players will need to head for Lightcast Island in the Tabantha Frontier Sky (-3691, 1063, 1796) and activate the green gateway found there. This will cause the water on the island to be drained, allowing players to reach a downward-leading tunnel at the island's center. After destroying the stone wall with a bomb or any other appropriate weapon, they'll want to follow the passageway further down, using the light beams and reflections to hop from island to island. Eventually, they'll come to a Zonai Construct who'll drop a Mirror Shield upon being defeated. If players then use this shield to reflect the nearby beam of light onto the yellow hexagon, they'll be returned to the surface of the island and will be able to find a chest containing the Zonaite Helm on a ledge just above them.
How to Upgrade the Zonaite Armor in Tears of the Kingdom
|
Level |
Defense |
Upgrade Materials |
|---|---|---|
|
- |
4 |
|
|
★ |
7 |
|
|
★★ |
12 |
|
|
★★★ |
18 |
|
|
★★★★ |
28 |
|

The Legend of Zelda: Tears of the Kingdom
- Developer(s)
- Nintendo
- Publisher(s)
- Nintendo
- Platform(s)
- Switch
- Released
- May 12, 2023