Death Stranding is a real anomaly of a video game. On the surface and through trailers, it seems like the most "art festival" sort of game, made with an insane amount of subtext and complex themes. Then, you play it and spend half your time making grenades out of feces or urinating on ghosts.
Seriously, Metal Gear makes more sense than this game most of the time. All this is to say that we adore Death Stranding, especially in the gameplay department because delivering packages is fun! But, it really only finds its stride at around chapter 3, so here are our best tips for helping players push through the slow start and onto the real game.
10 Use Auto-Sort, But Don't Depend On It

So, this game is basically a menu simulator, which is why people like Masahiro Sakurai, one of the best/worst menu designers and director of Smash Bros, loves the game. There's such an absurd amount of menus in Kojima's newest hit! But, the most important one is by far the Cargo Menu.
With well-placed packages, players can stack their cargo tower sky-high. And, a key feature that helps with that is the Auto-Sort, which automatically places your packages in the most "optimal" configuration. But, it sometimes puts Cargo on your suit or Fragile Cargo on top. So, just keep an eye out before confirming and make sure you protect your packages.
9 Don't Clean Up The First Map Until Halfway Through Chapter 3

Slight gameplay spoiler, Sam unlocks the ability to fabricate Trikes. But, you only unlock this ability after stealing a BRIDGES server back from the MULES in the second map. And this delivery is only unlocked after getting the Engineer, Craftsman, and Elder all to "join" the UCA.
But, since players would have to look this up to know, some have been heading right back to the Central Knot region to clean up old deliveries. It might seem weird, but don't go back yet. Wait until this fabrication is unlocked at the very least to save yourself tons of hardship.
8 Climbing Anchors Are Better Than You Think

Quite frankly after Chapter 2 we've been using Ladders and Climbing Anchors less and less. But, for the first 5-10 hours of the game before Lake Knot City, these supplies are tantamount. Most people just fabricated a huge pile of ladders, but Climbing Anchors are more useful in our opinion!
Why? Well, other than climbing up something, they do everything else better! Hold a rope to cross a river worry-free, Throw a rope down to walk through a windy area without falling over, or even put a rope down in advance as an easy escape route from MULES. Basically, don't just rely on ladders, trust us.
7 Check The Share Locker At Every Terminal

The Share Locker is where players can drop any cargo they don't want to finish delivering. And, other players can finish said delivery for them. It's a win-win, as the original player gets a completed order, and the helping player gets some tasty likes. But, as the game goes on, this locker starts filling up with an insane amount of Lost Cargo, so our pro tip is to only keep the ones for the location you want to rank up.
What about all the other ones? Throw them on the ground, then turn them right back into the same Terminal for about 20-50 likes per cargo. Weird, but it works.
6 Don't Freak Out At BT's Like A BB

For the first few hours, the Beached Things or BT's are straight-up terrifying. They're so mysterious, offputting, and potentially deadly. And, what's more, they're invisible! Well, mostly.
But, what players aren't understanding is that its a combination of standing still and using the Odradek scan that actually makes the BT's visible. You need to do both to see them, not one or the other. It might be tough to stop moving when the music and Odradek are freaking out. But just stop, hold your breath, and launch a scan, and the BT's will be clear as day.
5 Create Markers Through The L1 View

The Odradek is the fancy word for the thing on Sam Porter's back. And, players might also be familiar with the 1st-person view screen that can be accessed by holding L1. Sam can mark objects and destinations from this menu as well, and we recommend just that!
Why? Because every time you mark something in this view, a little display pops up and shows exactly where the ups and downs are from where you're standing to the marker. It's a much better way of testing for sudden drops than using that unwieldy touchpad rotation in the map screen.
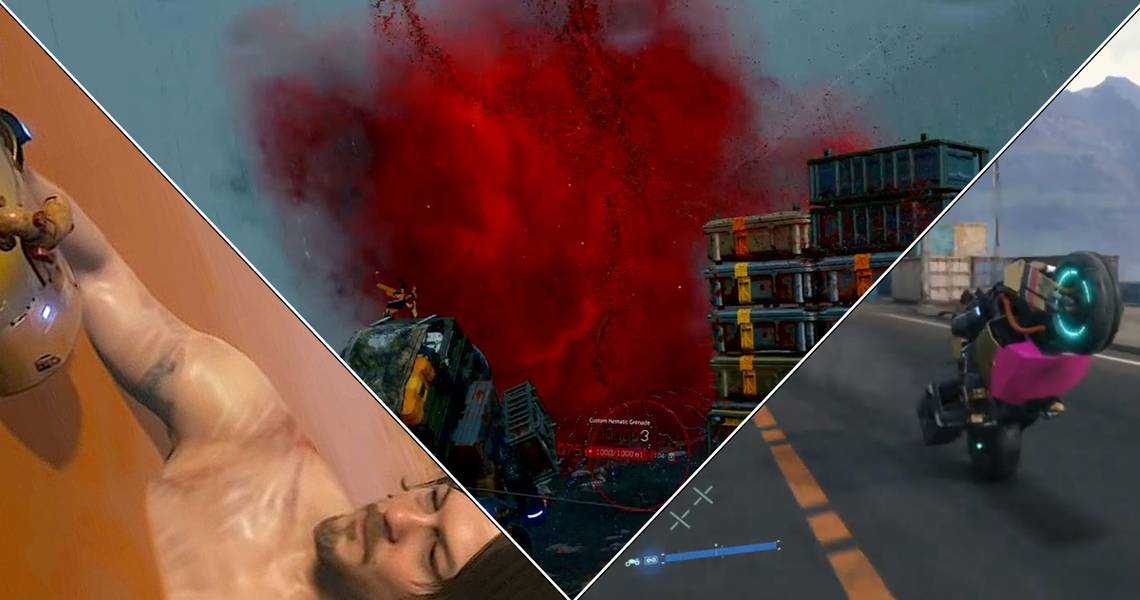
4 Hematic Grenades Turn You Into A Ghostbuster

Like we said earlier, the BT's are terrifying for the first little while of the game, and when Sam is caught, they get even scarier. That's because these hand-obsessed ghosts drag Sam to a nearby "arena" to fight a bigger badder BT boss. It's one of many things that aren't fully explained in the story. But, once the Hematic grenades and blood bags are unlocked, players don't need to be scared of BT's anymore...mostly.
The Hematic grenades "kill" BT's upon impact, and are quite an easy way to take out the mini-boss as well. It's perfect for fragile deliveries. Just throw everything but grenades in a postbox, fight the miniboss, then grab your stuff back to complete the delivery BT-free.
3 Build Bridges And Road Early For Easy Likes

There are "leaps" of construction in Death Stranding. In a game where players start with literal rope and ladders, the building gets pretty complex. We won't spoil a lot, but the early game ones are the Bridges, Generators, Roads, and Trikes. The Bridges and Roads, in particular, are insane for making rocky areas a lot easier to get through.
And, we insist that players dedicate the time and resources towards developing at least 2-3 of the Auto-Paver roads in the second map. The material cost might seem insane, but remember that you can just use the metals and ceramics sitting in any of the UCA Distribution Centers. Doing this quickly after unlocking the second map is an easy way for thousands of likes.
2 The Game Slows Down For Cargo Combo-ing Purposes

The concepts of the MULES in Death Stranding are an odd one. They're sociopaths who are obsessed with the Oxytocin released in the brain after delivering a package. A bit too on the nose much Kojima? But, other than their unintentionally comedic backstory, these guys are pretty scary in the beginning. Being "pinged" by their sensors gives an immediate sense of unease and their electric spears are a real pain.
But, the game itself slows down whenever Sam knocks a MULE out. Why? So he can grab the cargo they were carrying in his hand to swing into the next MULE. Utilizing these Cargo Containers is an instant knockout for any MULE and can clear camps in less than a minute.
1 Skip The Repetitive Teensy Cutscenes

Much like any other Kojima game, this director loves dialog. His cutscenes are long, it's about 50/50 between cinematics and gameplay. But, more than anything else, Kojima's gone crazy with all the micro-cutscenes in Death Stranding.
Whether its the Odradek BT Zone scene, the elevator scenes, the BB Mads Michelson scenes, the Drinking Monster scenes, or even the toiler scene. But, 90% of these are skippable. Simply pause and select "skip"! Don't worry, if it's an important cutscene, you'll usually be able to tell in the first second or two.