Besides boasting some of the biggest and most badass bosses in the world of gaming, Dark Souls 3 also possesses a few immensely tough enemies that are clearly a rank above the common threats that plague the Ashen One's journey through Lothric; the Minibosses.
There are 9 in total, and each is vastly different, for they all hail from different yet sinister and powerful origins. The Minibosses are a testament to the notion that the player's adventure in Dark Souls 3 needs to be filled with peril and powerful foes at every corner to truly be a fulfilling and satisfying voyage.
Updated on October 18, 2021, by Reyadh Rahaman: Despite each foe being daunting to face off against, there are many ways to defeat them--as long as one does not try to damage them with elements they are immune or resistant to. Whether by sword or spell, anyone can slay these huge fiends if they dodge accordingly and time their counterattacks well. Patience is a virtue, as seeking the ideal windows for attack will allow players to not only defeat their adversaries faster but also unveil the potential for critical attacks. A good rule of thumb for landing such strikes is to aim for the head...in most cases.
Ravenous Crystal Lizard

One of these crystalline behemoths is likely the first Miniboss that players will encounter, as one Ravenous Crystal Lizard can be found in the Cemetery of Ash. Ravenous Crystal Lizards are what regular Crystal Lizards turn into if they consume a huge amount of souls. Players that require Titanite Scales to upgrade their weapons should hunt these reptilian adversaries, as they are guaranteed to drop them.
Taking them down will be tough, as they have a variety of attacks and can be dangerous at any range. When far away, they will use a rolling attack that can run the player over, though this can be dodged by rolling right or left. At mid-range, they will use a breath attack that will form a line of crystals, which can also be dodged by a simple roll. At close range, they are the most deadly, for they can use their powerful tail or crystal-lined jaws to hurt the Ashen One.
To most easily defeat them, target their head, as they can get stunned if struck in the skull a few times, which will open them up to a critical attack. The big lizards are immune to status effects, so don't bother trying to cheese them while they sleep before the fight. They also resist magic and fire damage, so sorcerers and pyromancers should use spells of other damage types here.
Weapons with higher single-hit damage, such as greataxes and great hammers are better for opening a Ravenous Crystal Lizard up for a critical attack, as hits with them will reach the damage threshold to trigger the event that makes this foe vulnerable. The Boulder Heave pyromancy can be used to a similar effect, though mostly because of its high poise and stamina damage.
Demon

Horned beasts borne from The Old Chaos and some of the last demons to remain as their race slowly but surely goes extinct. Demons use their burning greataxe to unleash devastating cleaves and smashes against the much smaller Ashen One, though they also can erupt with fire damage in a dangerous AoE attack, which one should not try to block.
To take out these burning brutes, try to stick to their flanks or by their tail, as Demons don't have any dangerous attacks with their hind limbs. Obviously, fire is out of the question when facing a foe who is perpetually smoldering, and status conditions won't be much help either.
There is no easy method to slay a Demon; no possible critical attacks or very many weaknesses, however, reinforcements can be obtained to face them. The Demon in the Undead Settlement can be fought alongside Siegward of Catarina and the one in the Catacombs of Carthus can be tricked into fighting a mimic and a bunch of skeletons in the room it is found. Using a black knight weapon can also be helpful if one has the stats to wield one.
One of the few true elemental weaknesses the Demon possesses is to the dark. As such, dark sorceries and dark miracles can be excellent in dispatching these huge foes. Weapons enchanted with this element will also deal greater damage to the flaming enemies.
Boreal Outrider Knight
These swift and savage knights come from Irithyll of the Boreal Valley, and like many enemies from this cold locale, they possess chilling frost attacks that are unanimously feared by players. With agile, bestial movements, they can rush towards the player very quickly to launch many stabs and slashes.
Not only does each of their attacks build up one's frost meter, but they also drain a lot of stamina if blocked, so during battles with a Boreal Outrider Knight it's best to dodge their attacks. A duel with this foe will be about pitting one's speed and stamina against theirs.
Strangely, these icy warriors as resistant to fire damage, as well as the magic and physical varieties--however, they are weak to dark damage, so grab some Human Pine Resin to apply onto one's weapon if the player is lacking damage output against them. The Ashen One should also try to hit them in the head, as this can stagger them and leave them open to a riposte for massive damage. Alternatively, one can try to parry their attacks, however, this is not recommended due to the knights' impressive attack speed.
Alternatively, if facing such a knight from the front is proving problematic, players should try flanking them with a roll after one of their attacks, as this will let the Ashen One land a couple of strikes here and there. Using this method to whittle down a Boreal Outrider Knight's HP is the safest method, albeit one of the slowest.
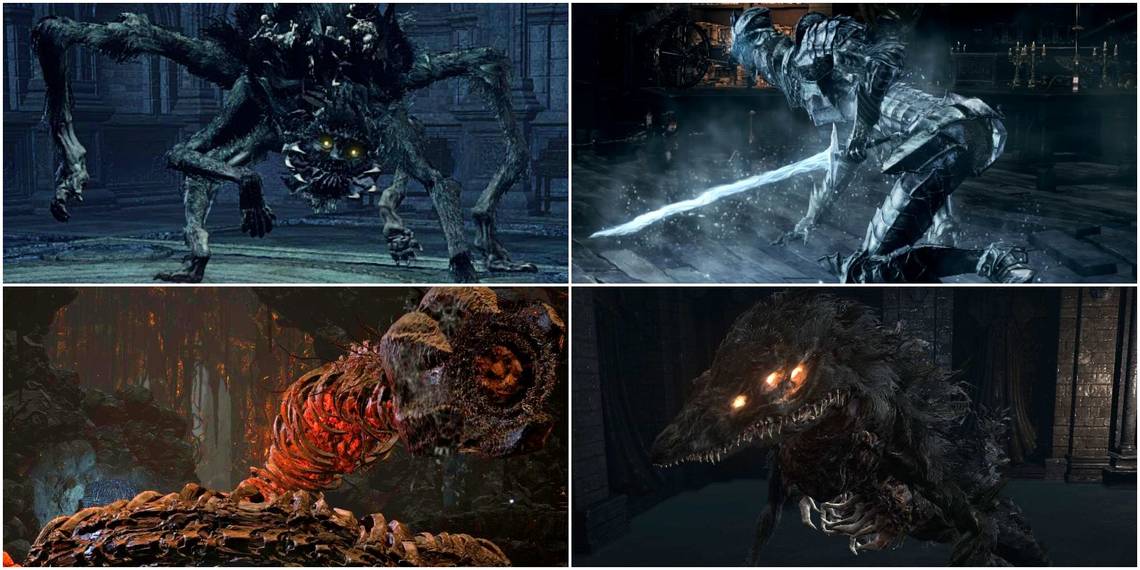
Deep Accursed

Foul, gigantic, and terrifying summarize the Deep Accursed. The many-limbed, hairy beasts are closely tied to Aldrich, Devourer of Gods, and his cult of The Deep. It is never explained what they are or what function they serve, therefore maybe they are like guard dogs of the more abyssal variety.
These gargantuan monstrosities can crush the player with body slams that follow very high jumps, chew them to bits with a mandible full of razor-like teeth, or straight-up curse them to death by exhaling a dank cloud that rapidly fills one's curse status meter.
Thankfully, Deep Accursed have a few elemental weaknesses, such as fire damage, in addition to being susceptible to bleed and frost. Furthermore, they can also be staggered and severely hurt with a critical attack if they are struck in the head a few times.
Due to their large forms and the areas they spawn, players can relatively easily take them out with ranged attacks, as Deep Accursed cannot get past certain small doorways in Anor Londo or in the Cathedral of the Deep. It's even possible to cheese them by hitting them with a melee weapon and then retreating beyond a low doorway so that they cannot hit back.
Stray Demon

This demon has lost its fire, yet remains tremendously dangerous, for it possesses a titanic great hammer to crush the player with and the physical pyromancy, Boulder Heave, which causes it to spew massive rocks at the player that deal big health damage, though even more poise and stamina damage.
The Stray Demon, which is found above the Old Wolf of Farron bonfire, is more dangerous than its fiery counterparts, as it cannot be safely attacked from the rear. If the player tries to do so, it will use a sweeping attack with its huge hammer or smack the player with their short yet strong tail. One should also be wary of fighting them from the front due to their devastating great hammer blows as well as a surprisingly fast grab attack.
As they are resistant to fire and lightning damage, as well as immune to all status ailments, players will have few options to combat this big threat. Those needing more damage output against this ashen brute should use a physical weapon that does strike damage or one that has sufficient dark attack, for these are the Stray Demon's 2 weaknesses.
A black knight weapon would also be useful here, as it will grant the usual 20% bonus damage against demons. Furthermore, aim for the legs, as if this Miniboss takes enough damage to them, they will shatter and leave the monster unable to move, though still capable of attacking.
Carthus Sand Worm

It's not mentioned where this tremendous worm came from, however, the item description on the Yellow Bug Pellet (a consumable that boosts lightning damage reduction temporarily) states that the grave wardens of Carthus used the pellets to fight against a great sand worm that tumbled into their realm long ago, but now it resides in the Smouldering Lake.
Arguably the most dangerous enemy in the game, including bosses, the Carthus Sand Worm is a colossal and ferocious fiend that attacks in the same predictable pattern, regardless of what else is happening, though, because its body is so tough, and its movement speed so high, the beast simply moving is enough to deflect one's melee weapons and possibly hurt the Ashen One. It can also unleash a beam of lightning in front of it, so stay out of this line of fire.
To wreck this giant worm, use any ranged attack from behind it. Provided one has enough ammo or FP, it will go down without much resistance. However, melee builds will have a tough time, as the worm's rocky hide makes delivering attacks awkward. If one takes the melee approach, use a thrust weapon, for this is the Carthus Sand Worm's only true weakness.
The best method for going about slaying the sand worm is to use the bonfire located near to the entrance of the Old Demon King's boss room, as, if things go wrong, players can respawn there for another attempt with little downtime. It should also be mentioned that greatbows with their huge damage and range can provide an even more effective way to kill this Miniboss than other ranged weapons.
Sulyvahn's Beasts

Few foes possess as much ferocity as Sulyvahn's Beasts. These are other abhorrent abominations that serve Aldrich and his cult of The Deep through Pontiff Sulyvahn's direct command. These powerful, wretched monstrosities are the culmination of the Pontiff's plan to transform his minions from men into literal mindless beasts of war.
They attack with vicious and rapid bites that can come from any angle, for they are surprisingly nimble despite their size. The beasts will use many consecutive attacks that will relentlessly shred one's HP if hit or stamina if guarded. It's best to roll here instead of block, though be wary of the monster's lightning breath attack that it can use at mid-range.
To slay a Sulyvahn's Beast, one must first avoid its savage assault by sticking near its hind limbs, though still being wary of the hideous creature's flexible neck and bite-range. Hitting it in the head hard enough will stagger this furry foe, causing them to expose their chest, which one can deliver a devastating critical attack upon. On top of this, they are also weak to fire damage and are susceptible to all status effects if one wants to take them out the easy way.
They are especially weak to bleed, so weapons like katanas that innately apply such effects can be greatly useful here--and their attack speed would help as well in avoiding incoming attacks. For spellcasters, Dorhy's Gnawing is a solid choice for applying the bleed effect to a Sulyvahn's Beast.
Ancient Wyvern

In addition to the one that appears as a boss at Archdragon Peak, there is another Ancient Wyvern found a bit further on after the gimmick-filled boss encounter. There's no real lore that explains the identities of either of these massive draconic foes, however, if one looks at Archdragon Peak from the lookout where one must teleport to it in Irithyll Dungeon, they will see a colossal wyvern resting upon it, nearly equal in size to the mountain, dead but glorious: a tombstone to mark the death of the dragons and the habitat of their final descendants.
This Ancient Wyvern's stomp attacks are its most dangerous, as the player must attack its feet due to every other part being out of melee range. They are very predictable, so dodging them should be fairly easy, though this bout will take patience, for the foe's legs take little damage and they have a lot of HP.
They are susceptible to thrust and lightning damage, as well as the frost status ailment, which gives players many great options in combat against the Ancient Wyvern. Players can even use ranged attacks for an easier time, for the Miniboss has few dangerous moves beyond their stomps.
Like with other large and mostly stationary foes, a greatbow can be especially effective at taking down the Miniboss version of the Ancient Wyvern quickly. Dragonslayer Lightning Arrows will be useful in such a venture, and they can be bought from Greirat (or the Shrine Handmaid if Greirat dies and the player gives her his ashes) for 750 souls each.
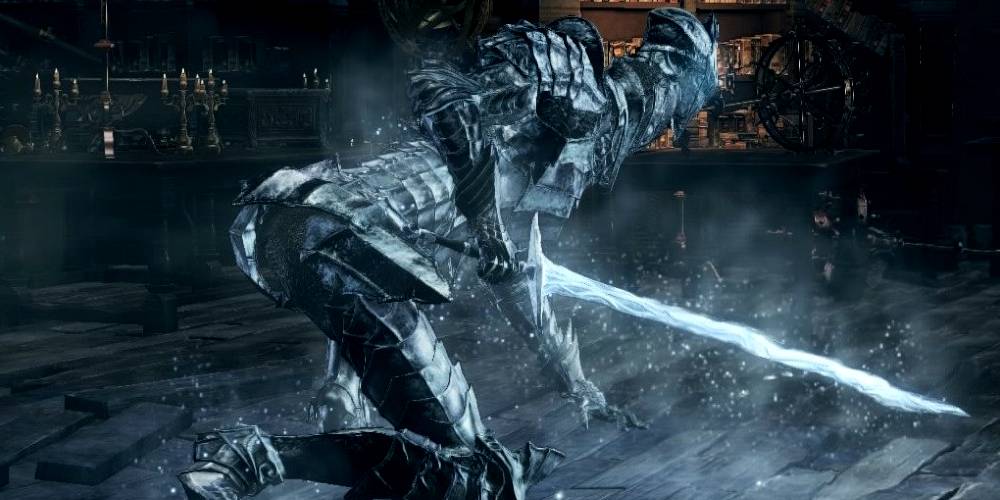
Iron Dragonslayer

Found in the foul swamps of The Ringed City DLC, this familiar foe is virtually identical to the Dragonslayer Armour boss. By this point, no one is impressed or surprised at a boss returning as a Miniboss, as it's been done a lot, though this at least gives players another chance to fight this powerful autonomous armor adversary.
The Iron Dragonslayer is apparently the same Dragonslayer Armour fought at Lothric Castle, though this is a future version of them that ended up in The Ringed City's collapsing amalgamation of worlds and timelines.
Defeat them like how one did before, though now in a much more open area; free from obstacles, potential falling hazards, and the dark red fireballs of the pilgrim butterflies.
Unlike the boss version that is only weak to frost and strike, the Iron Dragonslayer is weak to frost, strike, and fire, giving players plenty more options to take them down.